.svg)

How to Create a Ticketing System with Google Forms
In this post, we will learn how to create a minimal ticketing system using Google Forms. First, we will learn about a ticketing system.


If you've ever used software, you probably remember a time when you encountered an issue and needed to file a support ticket. The application probably asked you to submit a ticket via their ticketing system or a support portal.
IT support and help teams use ticketing systems to manage, store and organize support requests. While there are many good ticketing systems out there, you can hack together your own with a tool using Google Forms. You will lack the collaborative functionality of a modern dedicated ticketing system, but in a pinch, Google Forms can serve as a channel for managing your support tickets.
In this post, we walk you through how you can create a ticketing system with Google Forms.
What Is a Ticketing System?
A ticketing system is a dedicated tool used by IT support teams to organize, store and escalate customer issues. When a customer submits an issue, the ticketing system creates a ticket with some metadata that describes the issue. This includes details about the issue, what part of the product it pertains to, where the ticket will escalate if needed, and the customer's contact information.
The support team works on these tickets one by one to solve the issues. Once the team fixes an issue and conveys the information back to the customer who submitted the ticket, the ticket is marked as resolved, and you have a happy customer!
A ticketing system allows you to document and solve customer issues in a more organized way that’s both efficient and effective.
Set Up a Ticketing System Using Google Forms
Now let's see how we can use Google Forms to create a simple ticketing system. First, we'll create a new form called Ticketing System. This is where you’ll create a ticket. This form will have three action choices —choosing a ticket type, creating a ticket, and closing a ticket.
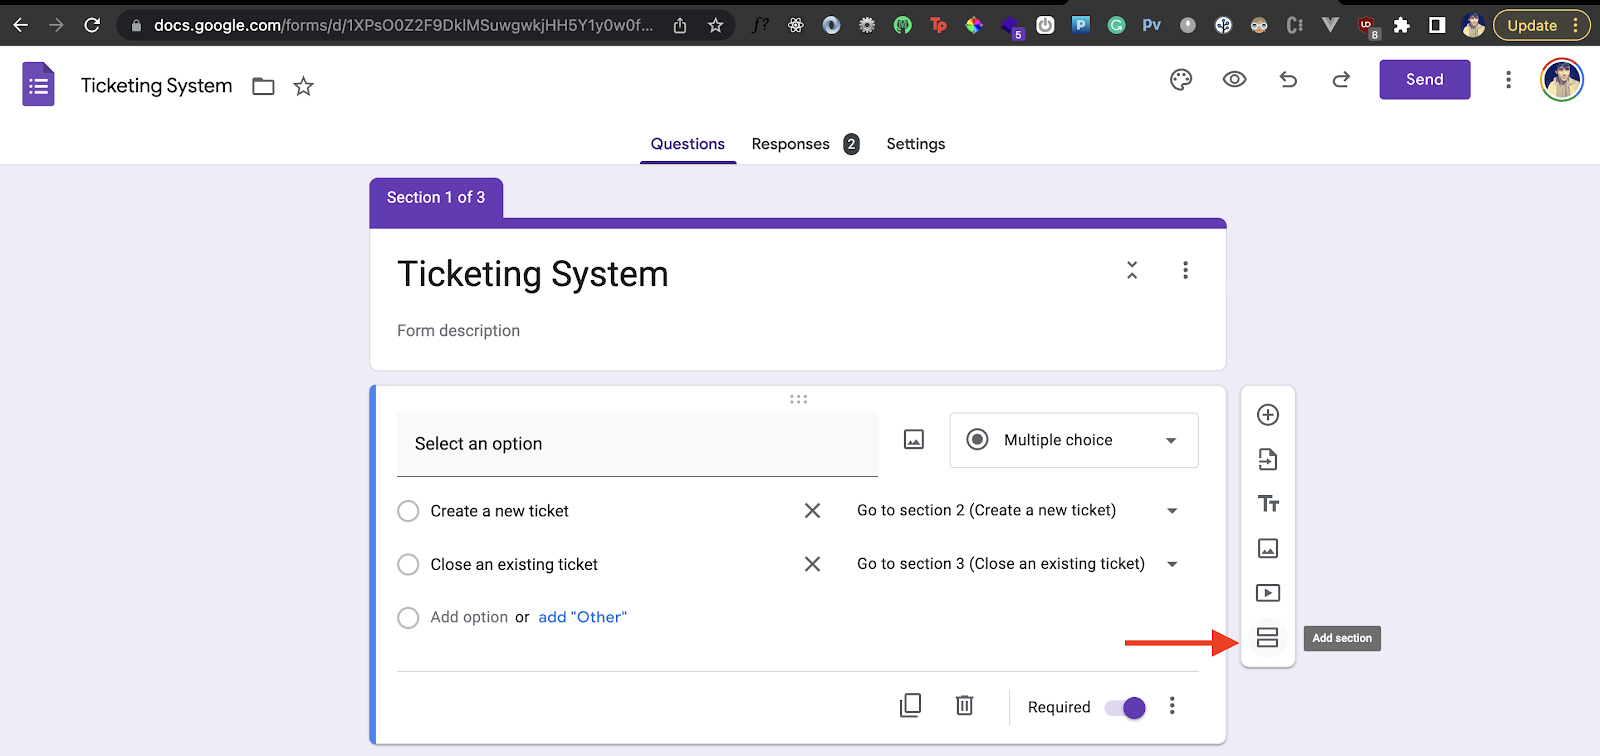
Create two sections, titling one Create a new ticket (Section 2) and the other Close an existing ticket (Section 3). You can create a section by selecting the last option on the right menu that appears next to a question:
The first question in the form will be Google Form’s version of a multiple-choice question (MCQ): Do you want to create a new ticket or close an existing ticket. The form will require a response, and based on the response selection, the form will take you to one of the sections we created.
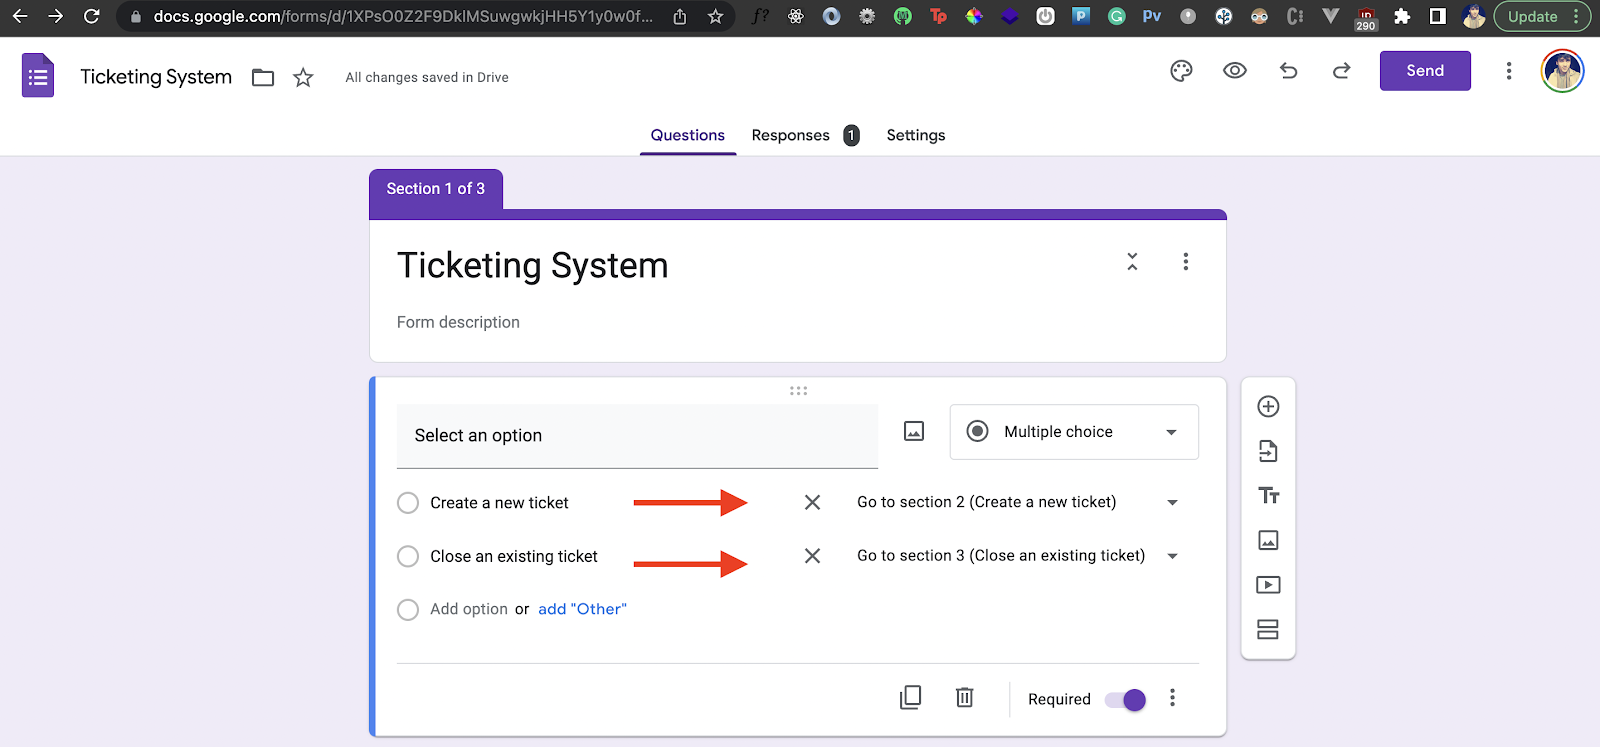
To link the selected option to a section, click on the three dots at the bottom right corner and select the Go to section based on answer option.

Creating a New Ticket
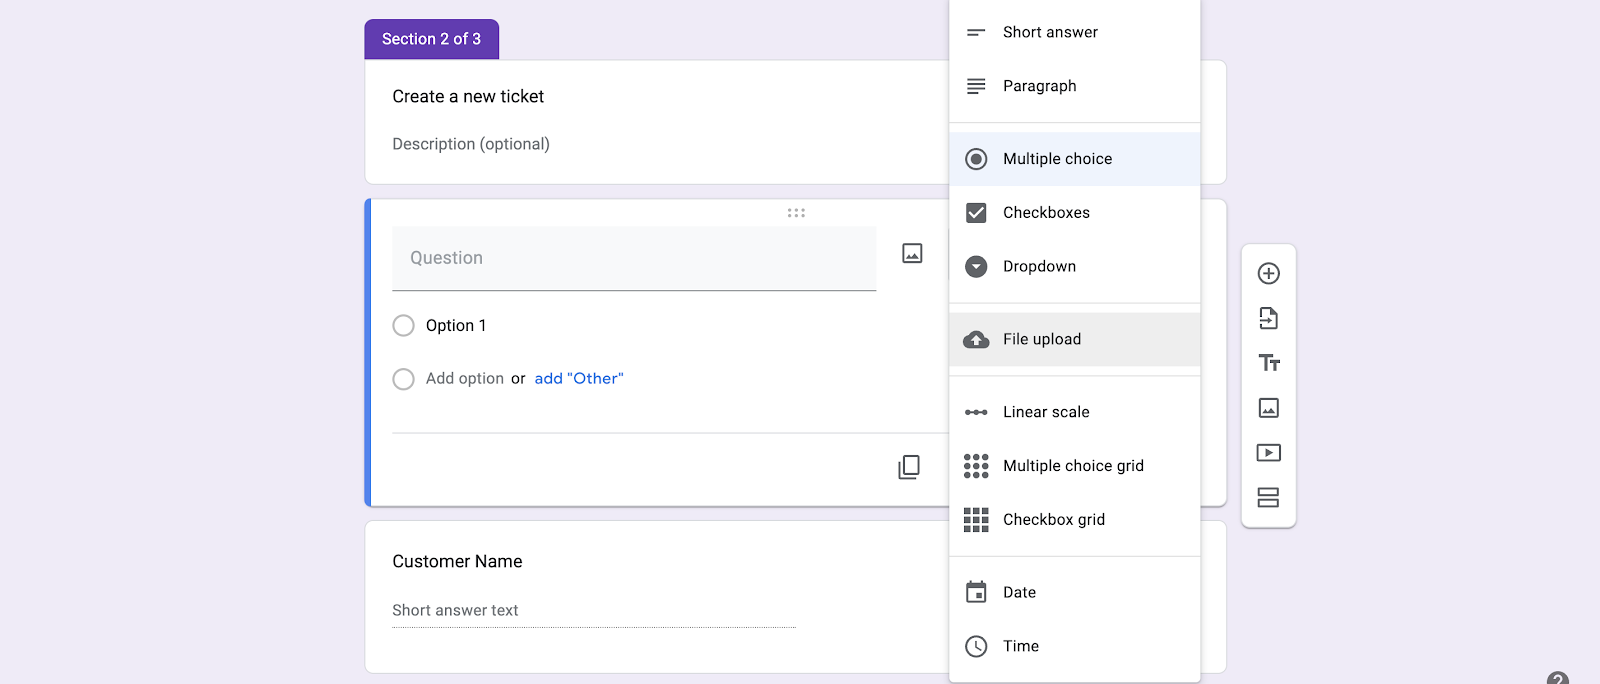
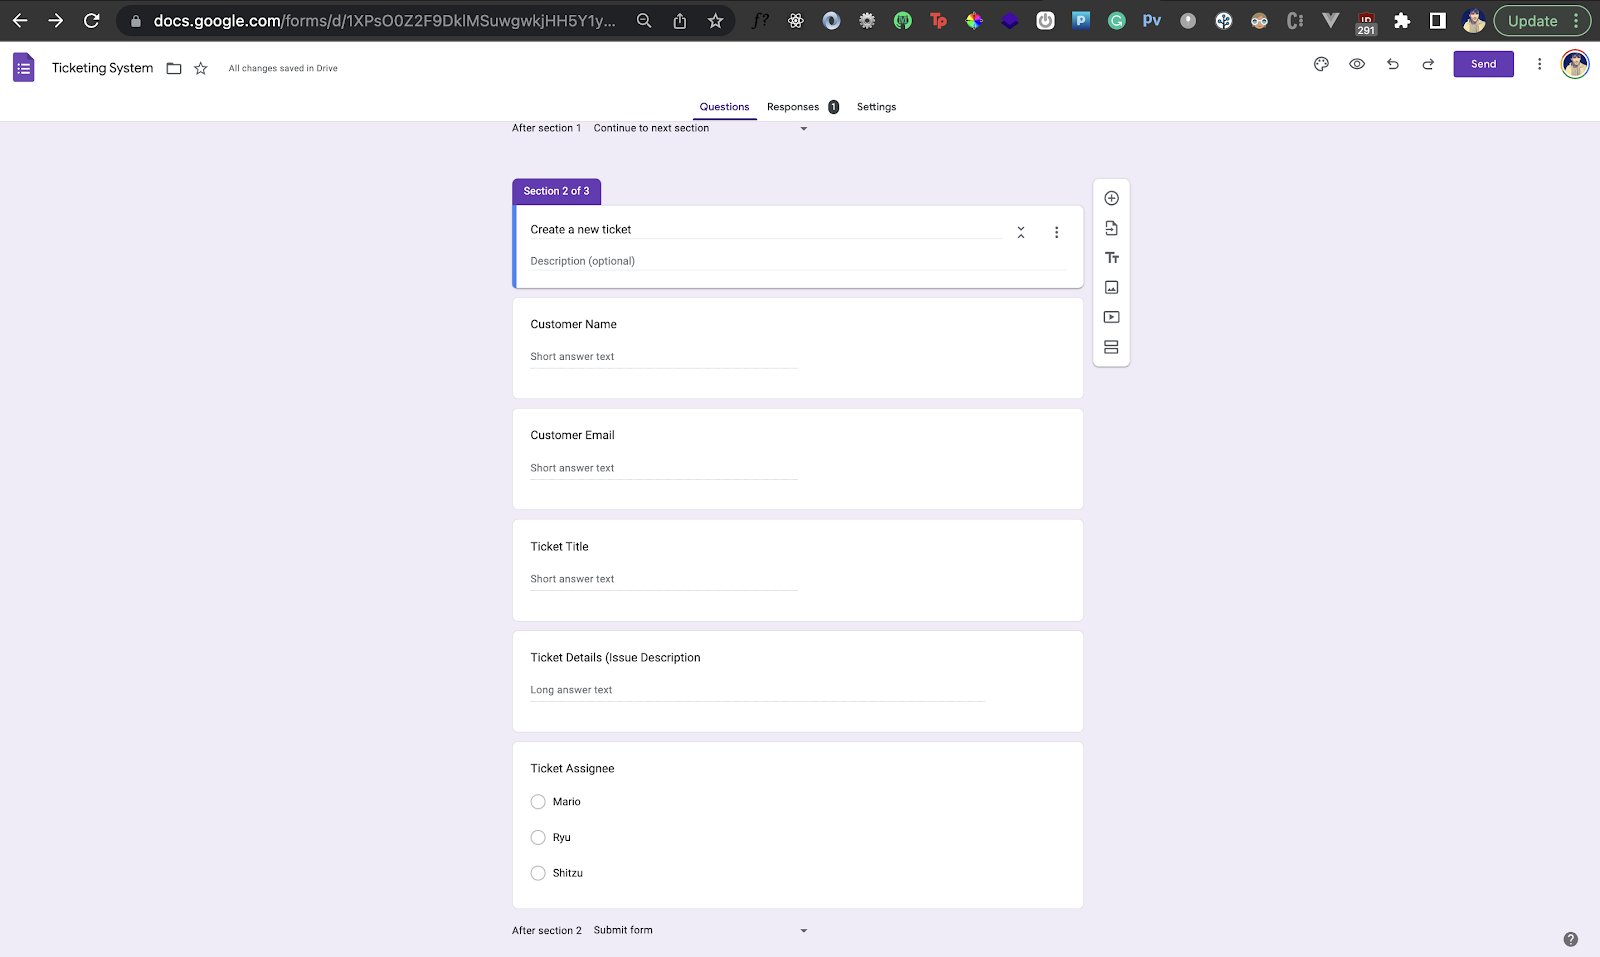
Now, in Section 2, let's add some basic questions to create a new ticket. This might include a title for the ticket, the customer name and email, a description of the issue, and the support agent whom this ticket is assigned. When you create a new question, you can choose an appropriate answer type for a question via the answer type dropdown:
Then select Submit as the After Section 2 action. Otherwise, the form proceeds directly to Section 3.
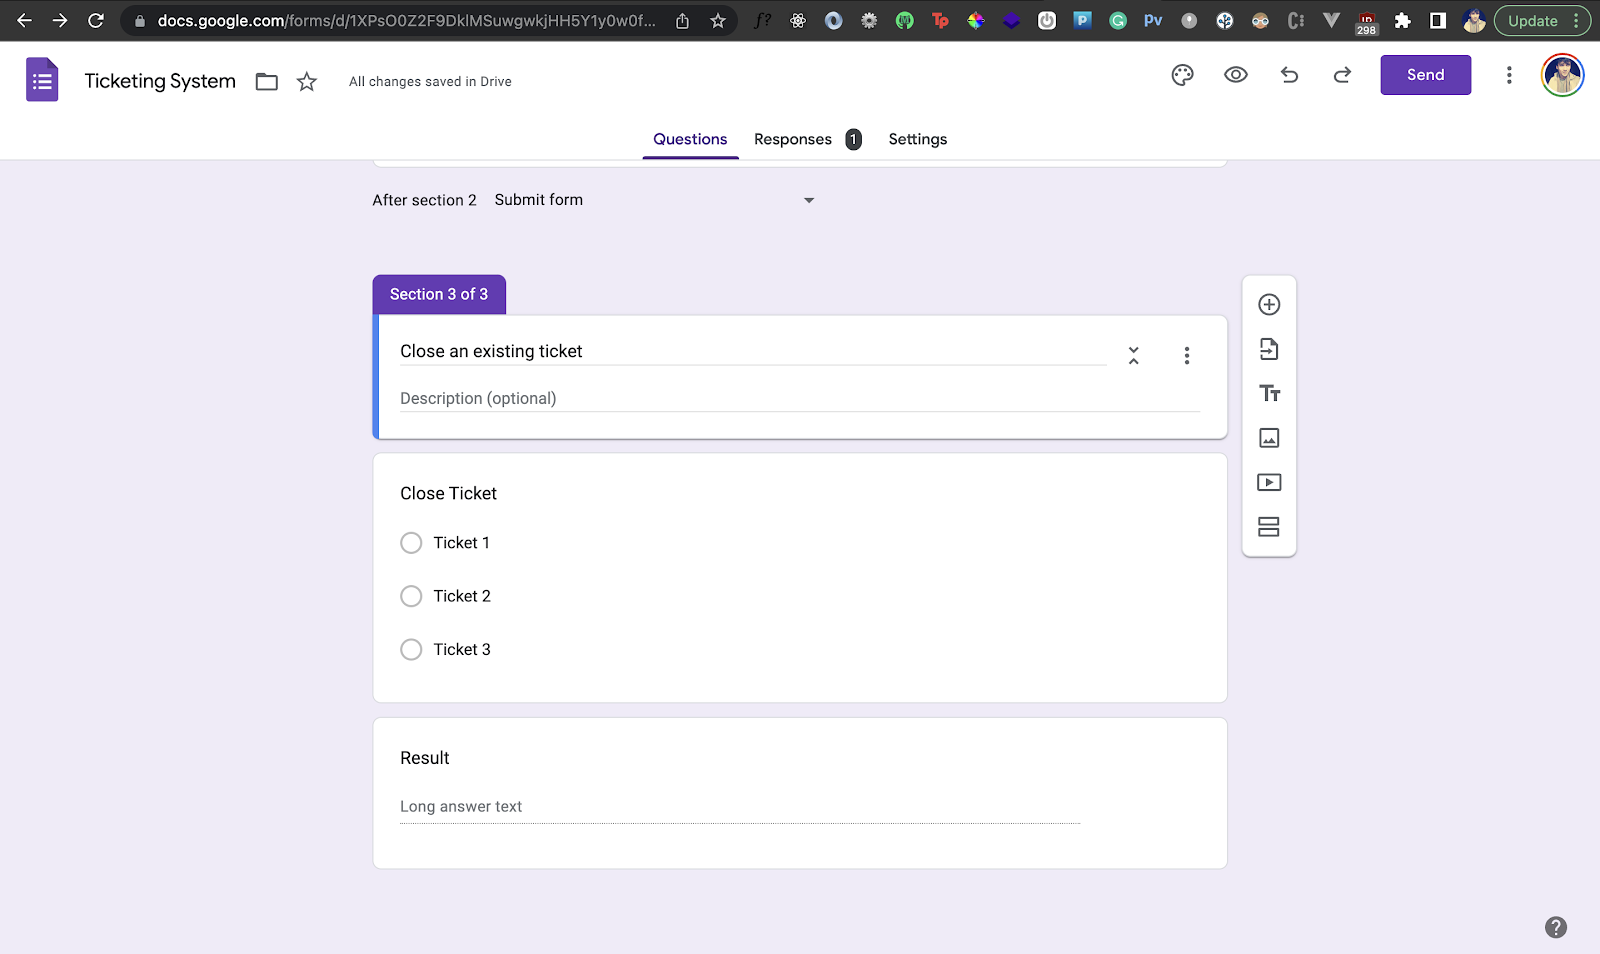
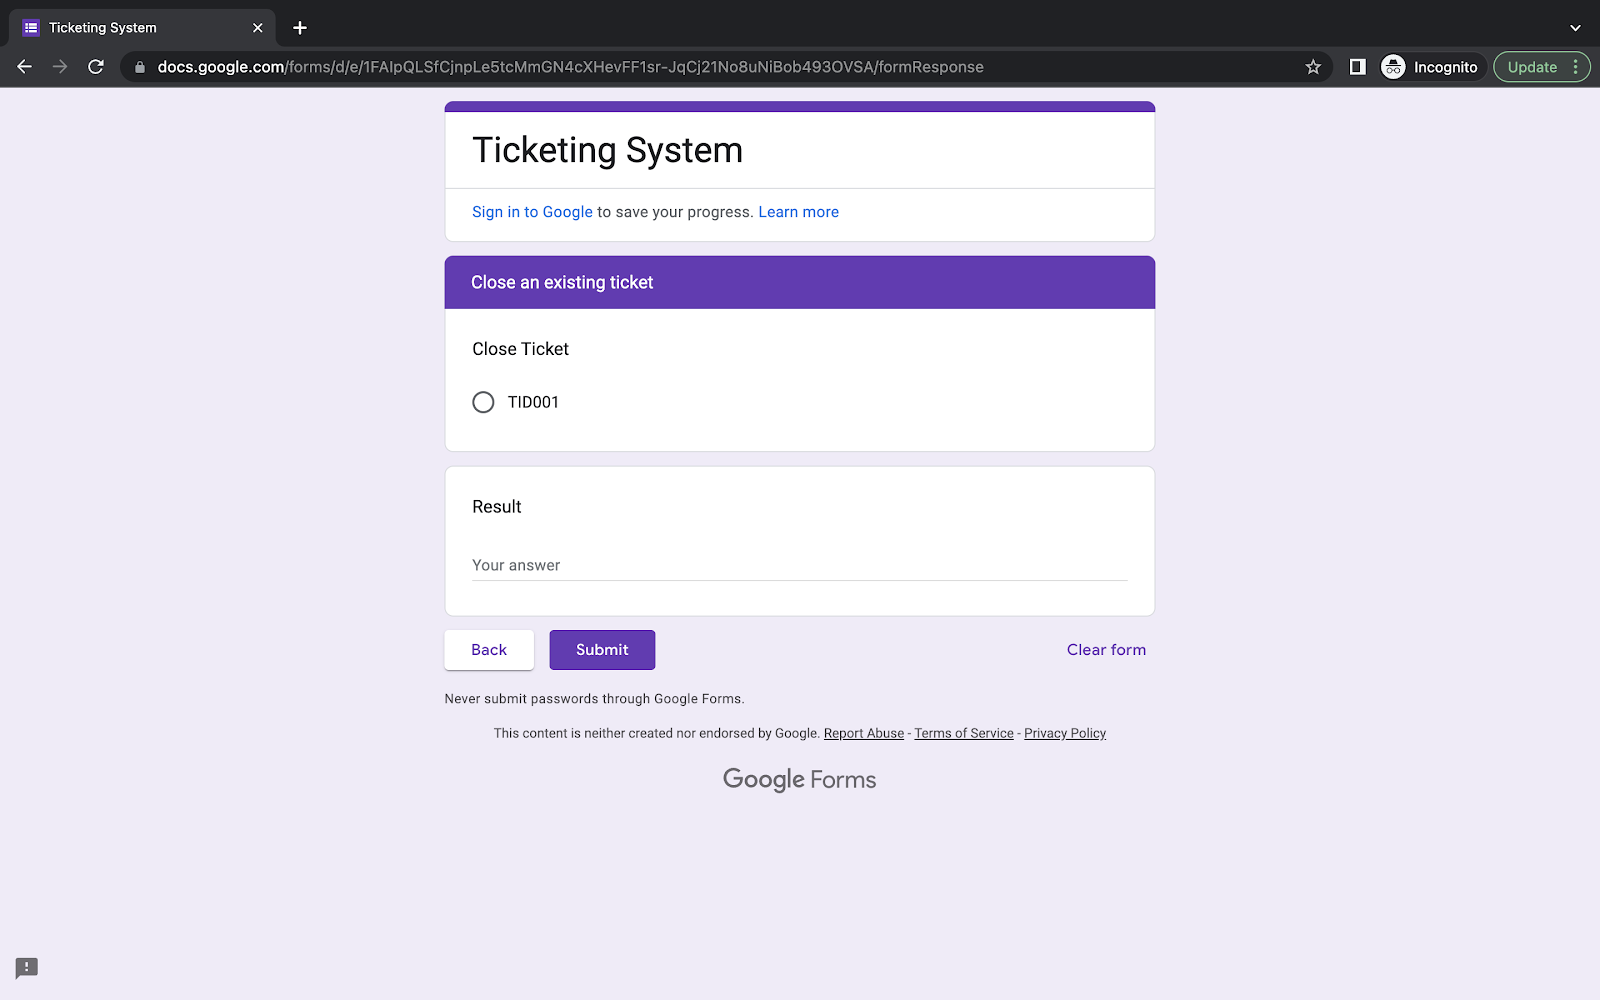
Closing an Existing Ticket
Let's create the third section, which we will fill in to close a ticket. Here, we'll have another multiple-choice question for the support agent to indicate which ticket they want to close. We’ll also have a Result field where they can type in the final solution for this ticket. This will help the team understand and validate the level of customer satisfaction achieved with this ticket.
Analyzing Ticket Response
We more or less have a Google Forms ticketing system in place! However, there's still room to improve. For instance, analyzing responses in this form will be a nightmare unless we have something like a spreadsheet. Luckily you can view and manipulate data collected in your Google Form directly in a Google spreadsheet.
But first, let's fill out a sample ticket and verify that our current ticketing system works and collects the necessary data. Go to Preview mode (eye icon at top of window) to open a new tab with the fillable form.
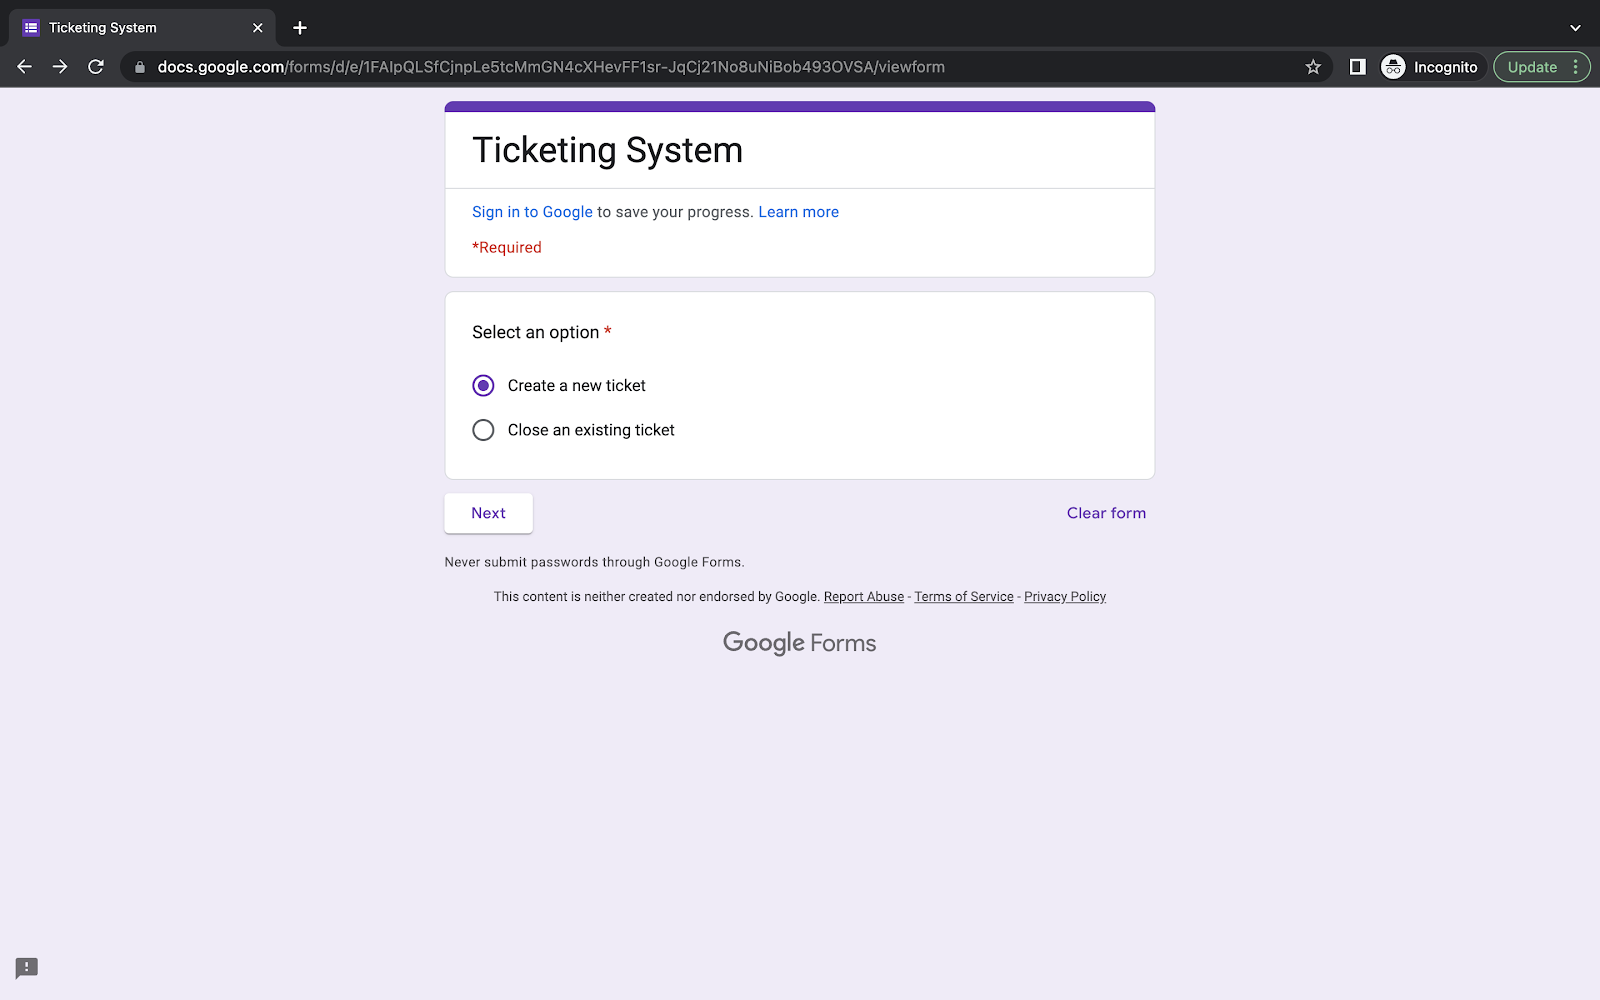
Choose the Create a new ticket option. Click Next and then fill in the details:
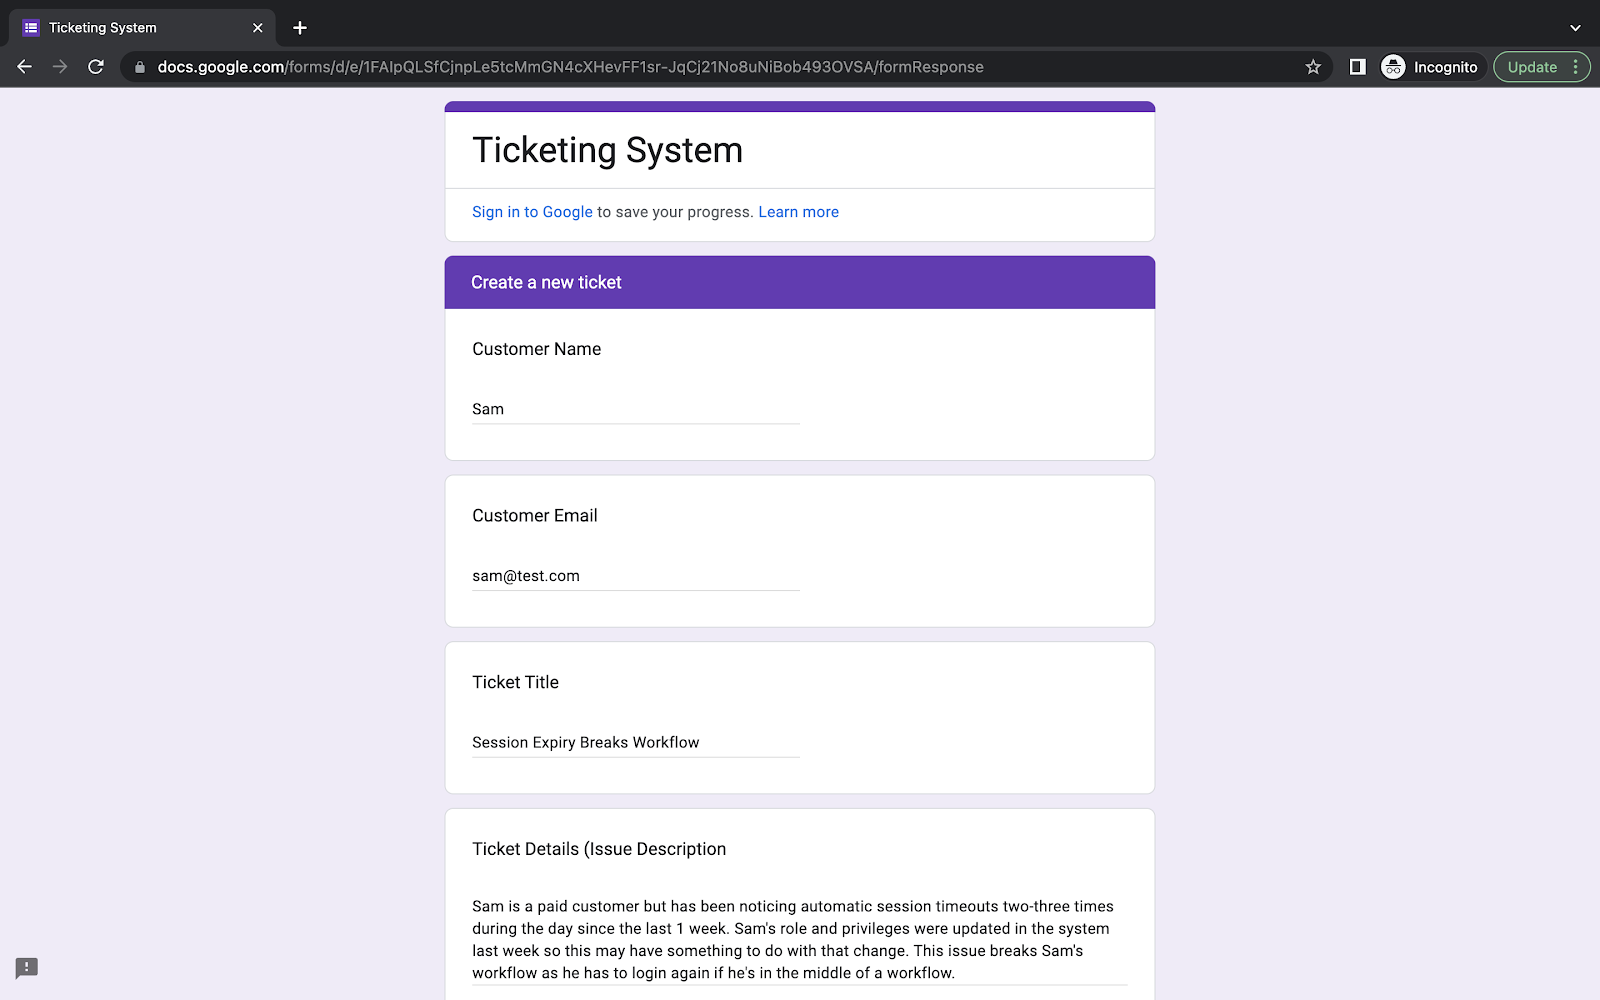
And then, submit this ticket:

Go back to Google Forms tab where you created the form. If you select Responses, just above your form, you should see the output of this ticket. You should also have the option to view this output in a Google Sheet:
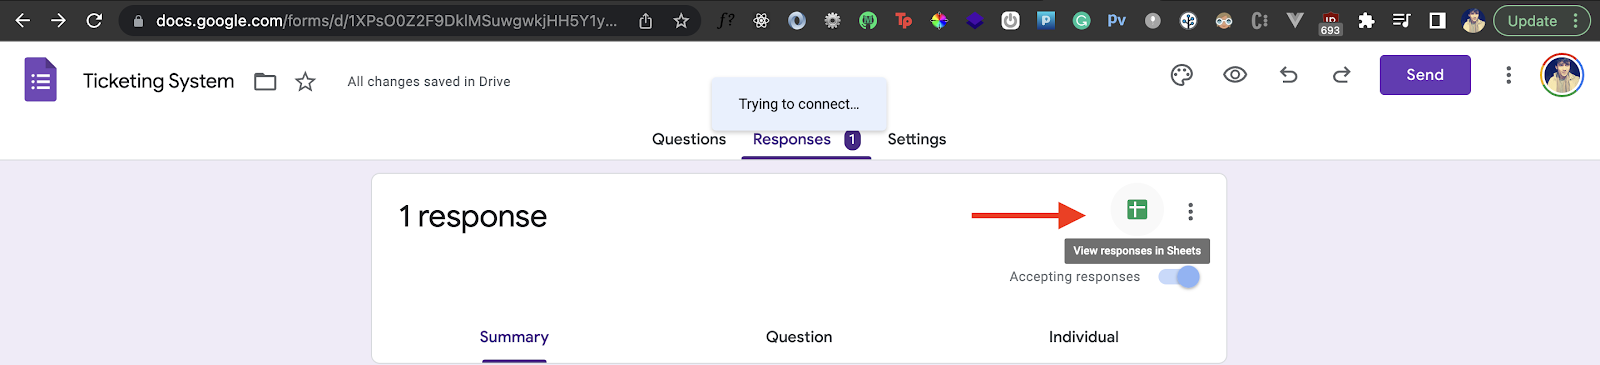
Click the Google Sheet icon to create a spreadsheet, and you’ll see the flat ticket form data in a Google Sheets spreadsheet:

Awesome! We can now use some powerful features of Google Sheets to automatically generate a unique ticket ID for each ticket linked to our Google form. Let's do that next.
Generating Auto Ticket IDs
On the response spreadsheet, add a column to the left of the Timestamp column and call it Ticket ID. Then, in the first cell underneath that column, add the following formula:
=ARRAYFORMULA ("TID" &
IF(ROW (B2:INDEX (B2:B, COUNTA (B2:B)))-1<100,
text(ROW (B2:INDEX (B2:B, COUNTA (B2:B)))-1,"000"),
ROW (B2:INDEX (B2:B, COUNTA (B2:B)))-1)
)
You should see the cell updating with the formula when you paste it:
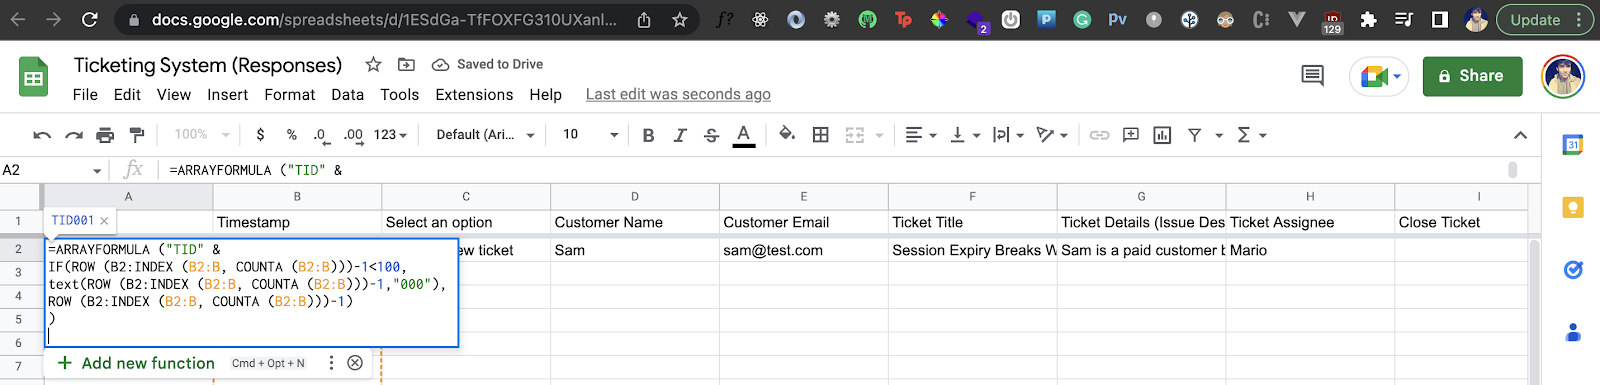
And once you hit enter, you should see that you generated a unique ticket ID for this ticket:

Now every time you fill out a ticket in your Google Form, each ticket will automatically be assigned a new unique ticket ID. You can use this ticket ID to update, delete, and track a ticket. We'll do something similar to track active, closed, and open tickets. In the same Google Response Sheet, create a new Google Sheet called Ticket Tracking Sheet with the following fields:

Similar to generating ticket IDs, we'll autofill the open tickets using the below formula:
=IFERROR( FILTER( 'Form Responses 1'!A2:A, 'Form Responses 1'!C2:C = "Create a new ticket"), "")
And we'll use a similar formula for the closed tickets:
=IFERROR( FILTER( 'Form Responses 1'!I2:I, 'Form Responses 1'!C2:C = "Close an existing ticket"), "")
Finally, we’ll extract the difference between the two columns to fill in the active tickets:
=IFERROR( FILTER( A2:A, len(A2:A), iserror( match( A2:A, C2:C, 0))), "")
It should then autofill the Opened and Active column in the Ticket Tracking Sheet:

Great! Now every time a new ticket comes in, these two columns will automatically populate.
Closing a Ticket
If you’ll recall, when we added Section 3 for closing the ticket in our Google Form, we simply hardcoded some sample ticket IDs. We need the ability to automatically add the ticket IDs generated in our response sheet into the MCQ question options of the Closing Ticket section. Then, we also need to update the response sheet when we close a ticket. To do this, we'll use a little automation across the two tools we've been using. We'll use a script on our Google Sheet that will automatically update the sheet and communicate with the Google Form data.
If you're new to using scripts, this may seem a little tricky, but don't worry — we'll proceed step by step, so you understand everything.
Google Sheet Script for Ticket Closing
On the spreadsheet, go to Extensions and select the Apps Script option:

That should open a script editor for you. Paste the following script inside it:
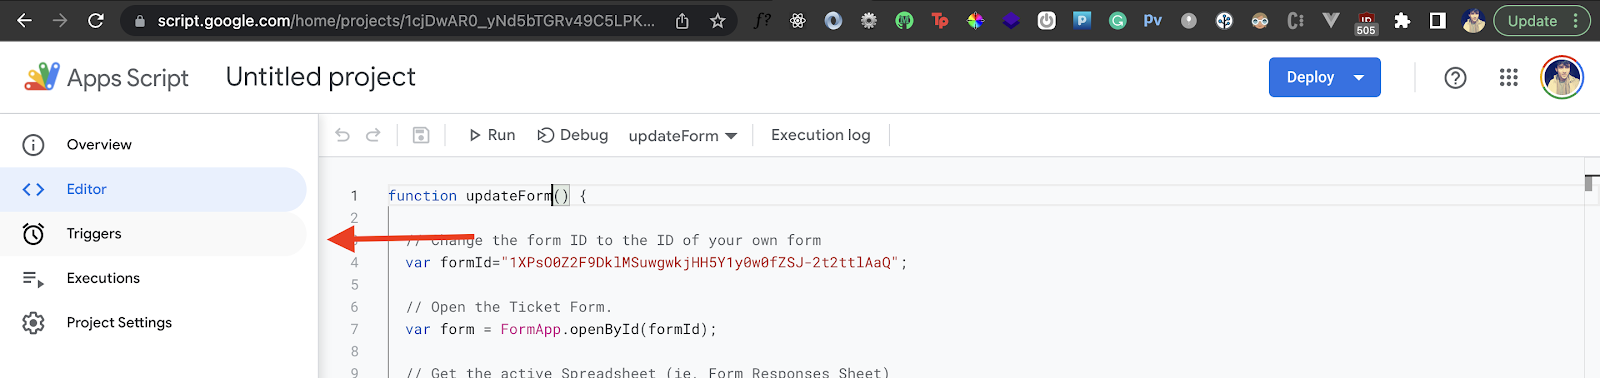
function updateForm() {
// Change the form ID to the ID of your own form
var formId="1XPsO0Z2F9DklMSuwgwkjHH5Y1y0w0fZSJ-2t2ttlAaQ";
// Open the Ticket Form.
var form = FormApp.openById(formId);
// Get the active Spreadsheet (ie, Form Responses Sheet)
var ss = SpreadsheetApp.getActive();
// Get the Question for "Close Ticket" from the "Close an existing ticket" section
var tickedID = form.getItemById("1601413612").asMultipleChoiceItem();
// Get the sheet where the active, closed and open tickets id's are present
var tickets = ss.getSheetByName("Ticket Tracking Sheet");
// Get the open ticket id's from the Ticket Tracking Sheet
var openTickets = tickets.getRange(2, 5, tickets.getLastRow()).getValues();
var ListItems = [];
// Store the open ticket ID's
for(var i = 0; i < openTickets.length; i++)
// Ignoring emptuy cells
if(openTickets[i][0] != "")
ListItems[i] = openTickets[i][0];
// Update the Multiple choice questions with the ticket ID's (ListItems)
// Last Ticket
if (ListItems == 0) {
tickedID.setChoiceValues(["No open tickets"]);}
if (ListItems != 0) {
tickedID.setChoiceValues(ListItems);
}
//Grab the last form response
var responses = ss.getSheetByName("Form responses 1");
var lastTicket = responses.getRange(responses.getLastRow(), 1, 1, 10).getValues();
//If Close Ticket
if(lastTicket[0][2]=="Close Ticket") {
var allTickets = responses.getRange(2, 1, responses.getLastRow()-1, 10).getValues();
}
}
Let's go over what we're doing in this script one step at a time. First, we need a reference to our Google Form. The form variable provides that by getting and opening the form for the specified formId. Here's how to get the formId for your own Google Form: Open your Google Form in edit mode and copy the URL of your form, which will look something like this:
https://docs.google.com/forms/d/1XPsO0Z2F9DklMSuwgwkjHH5Y1y0w0fZSJ-2t2ttlAaQ/edit
The string between /d and /edit is the formId. So in the above case, the formId is:
1XPsO0Z2F9DklMSuwgwkjHH5Y1y0w0fZSJ-2t2ttlAaQ
Paste your ID into the formId variable in your own script. Once we have a reference to the form, we grab a reference to the active sheet. After this, we loop over the opened ticket IDs and store them in a variable.
Then we get a reference to the close ticket question on our Google Form and populate the options for the MCQ question from the response sheet. Finally, when we close a ticket, we update our response sheet. Make sense?
Getting the QuestionID for a Question in Google Forms
You need to make one more change so that the script runs correctly for you. Take note of this part where we grab a reference to the Close Ticket question:
var tickedID = form.getItemById("1601413612").asMultipleChoiceItem();
The ID passed to the getItemById method is actually a question ID. Unfortunately, there is no direct way to get that question ID, so I created a little script that you can run to see the questionID for each of your Google Form’s questions. Save this somewhere because if you use Scripts and Google forms a lot, it will come in really handy for the future!
We'll run this script on our Google Form instead of the response sheet:

Then paste the following into the script editor of our Ticketing form:
function myFunction() {
var form = FormApp.getActiveForm();
var items = form.getItems();
for (var i in items) {
Logger.log(items[i].getTitle() + ': ' + items[i].getId());
}
}
Hit Save and then Run the script:
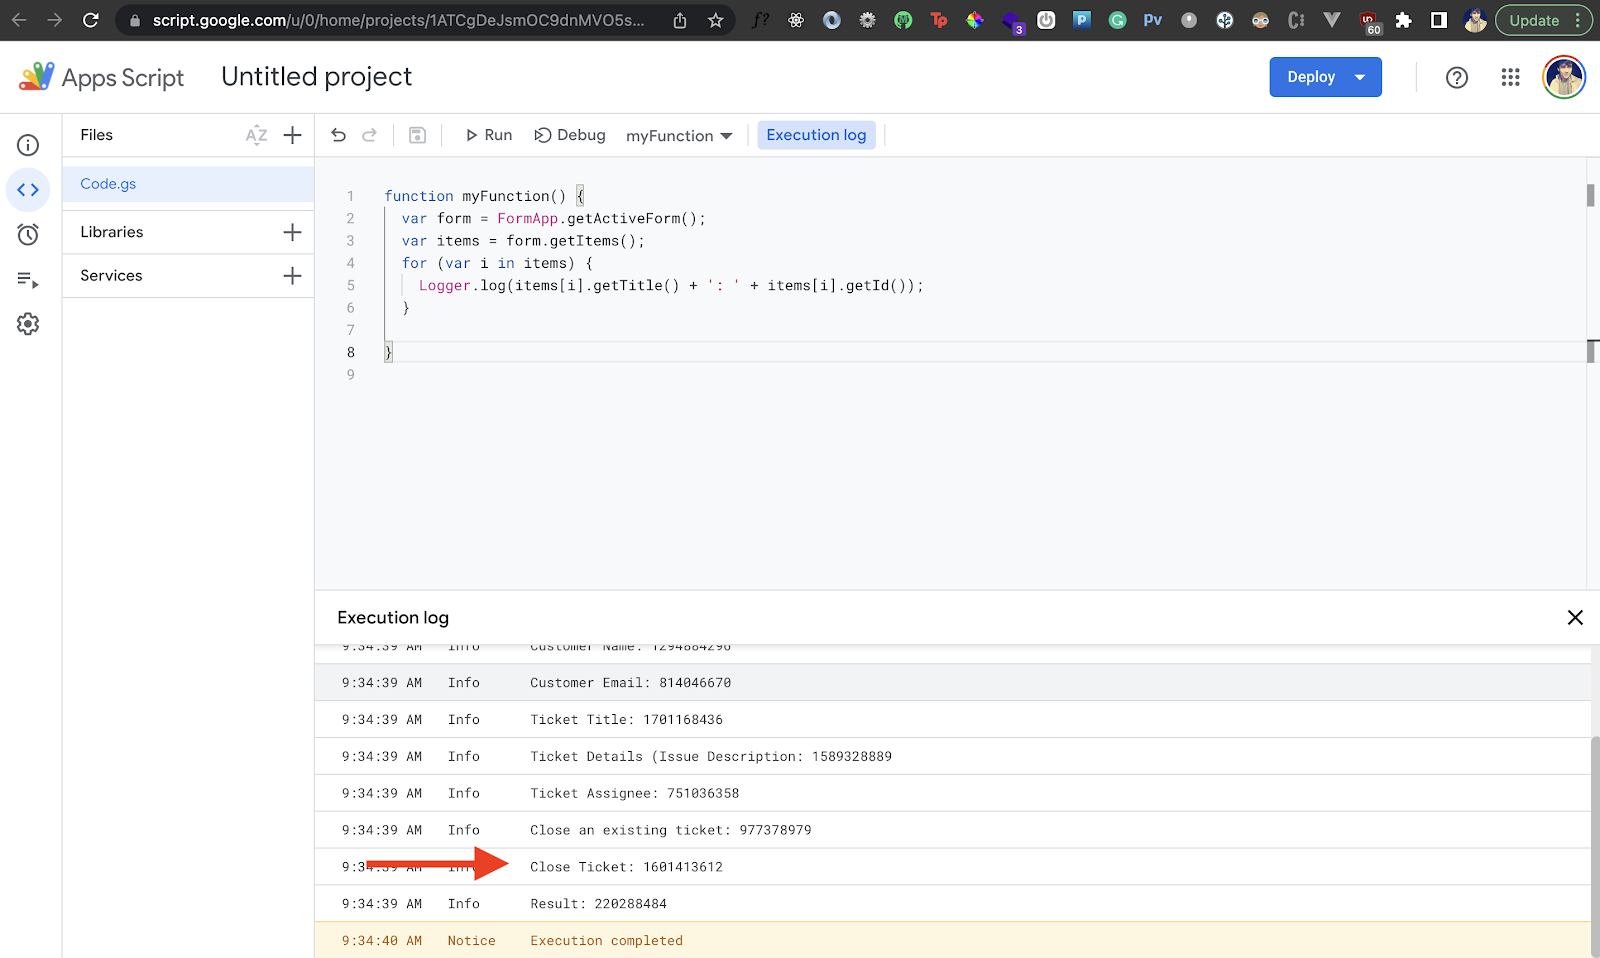
You can take the question ID corresponding to the question. In the above script, we get our form and loop through all the fields and questions the form contains. We then print the title of a question alongside its ID. You can then look at the logs, figure out which question ID you need, and use that wherever you want. We need the ID for the question 'Close Ticket', so we'll grab that from the logger and replace it in the previous script. Hope this was helpful!
Running the Close Ticket Script
Let's now run our earlier script to close the ticket:
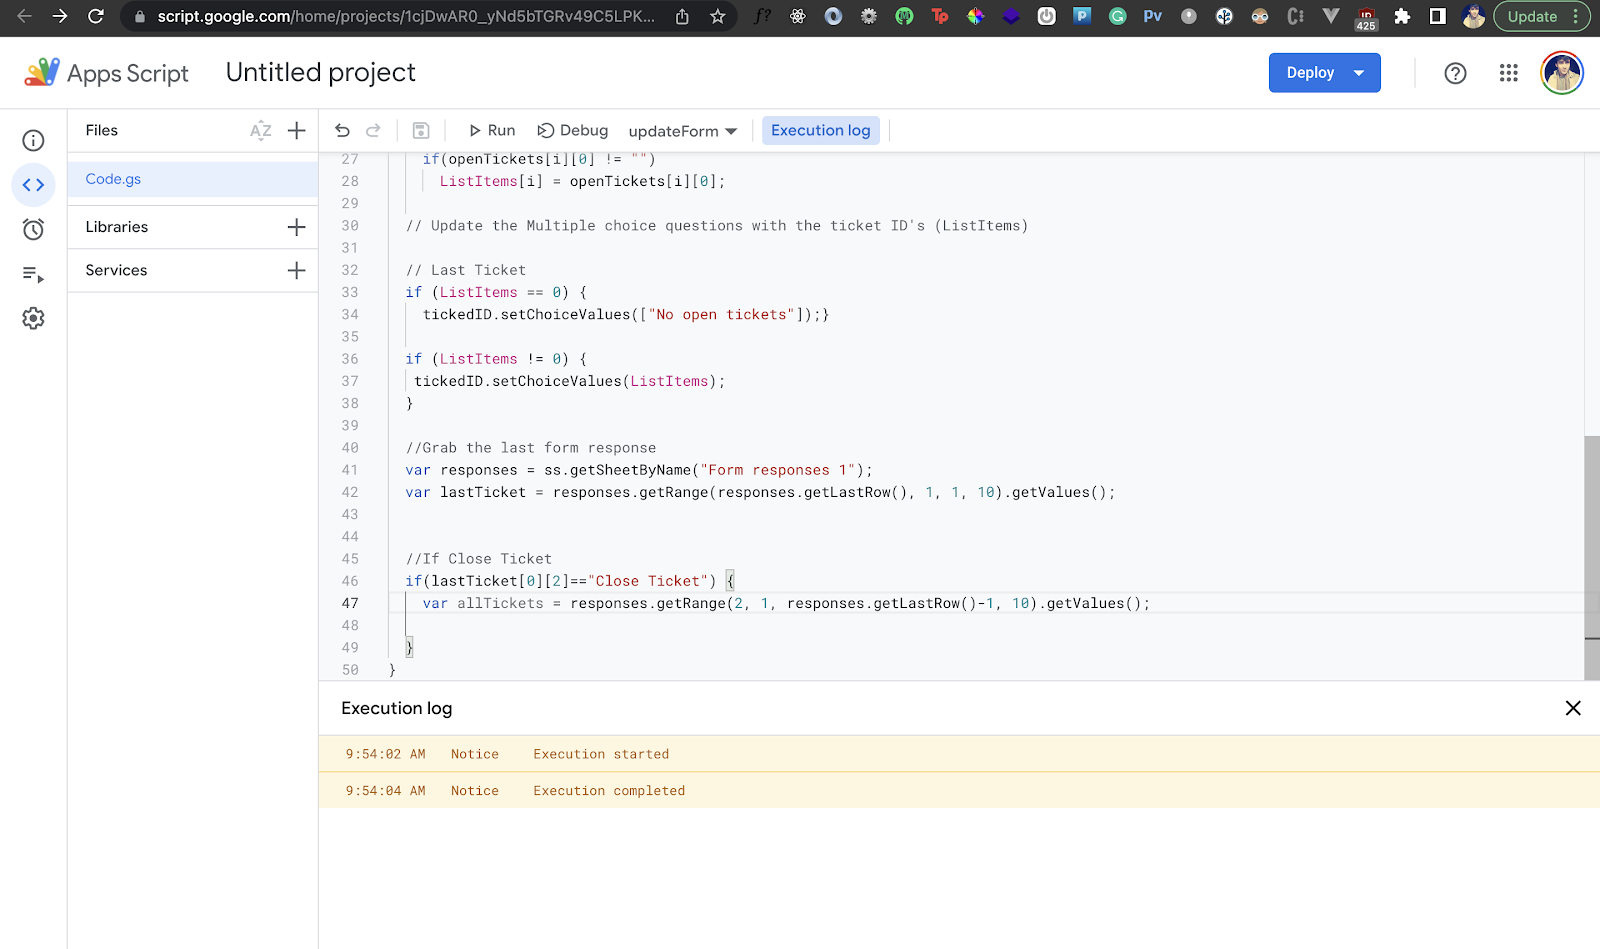
Looks like it worked! Let's verify this by filling in our ticket form to close a ticket.
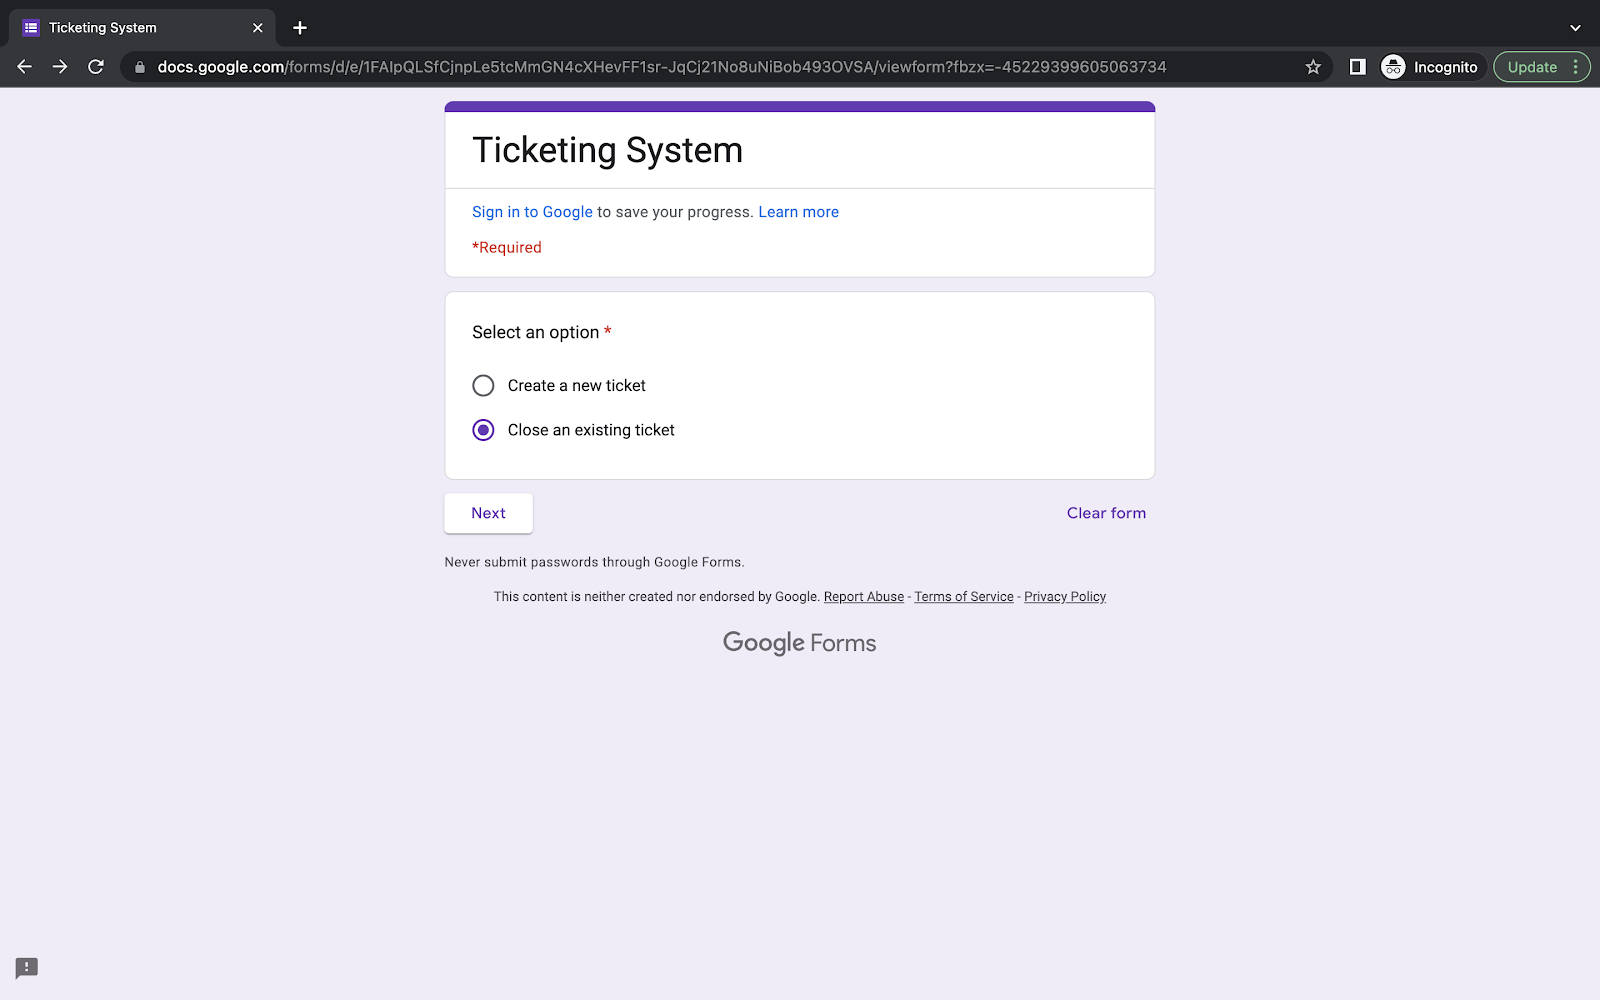
Once we select the Close an existing ticket option, we should get the correct ticket ID in the options for the Close Ticket question:
Awesome! Let's go ahead and close this ticket now. Our Ticket Tracking Sheet should be updated as shown below:

Similarly, we should also get a new response in our Response Sheet:

Great! We've come full circle for a basic ticketing system using Google Forms, Google Sheets and Google Scripts.
Running the Script Using the Form Submit Trigger
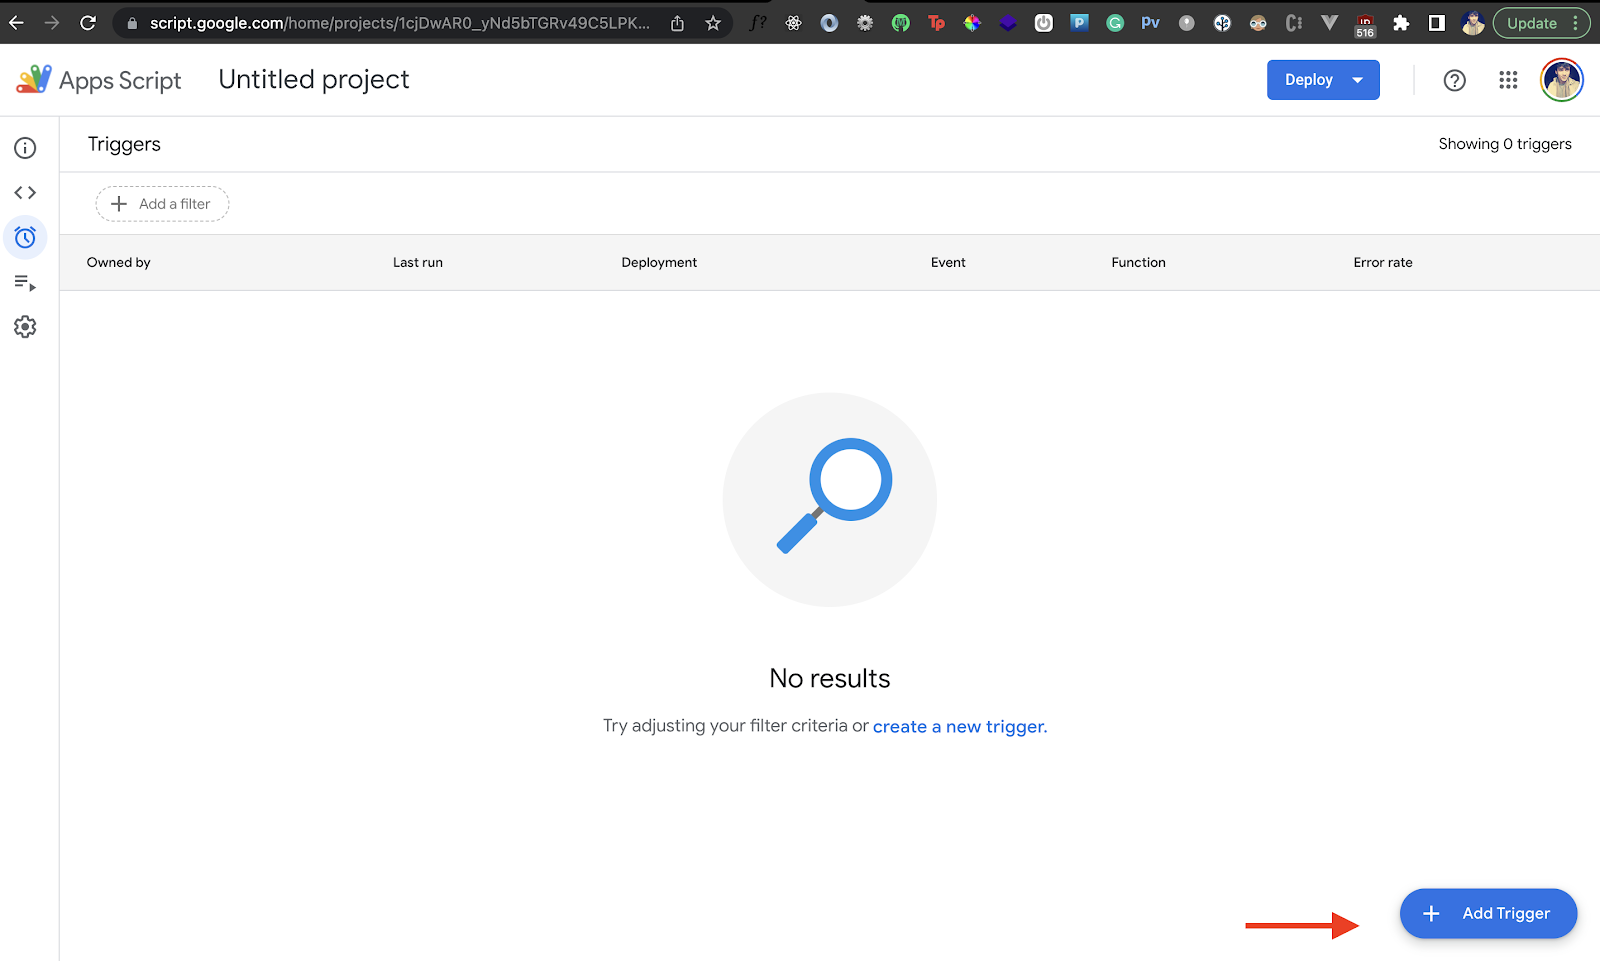
There's just one little step that remains now. We need to run our Sheets script every time someone submits a ticket form. For that, we can use a script trigger. On the far left-hand side of the script editor, go to the trigger panel (alarm clock icon):
Then click on the Add Trigger button:
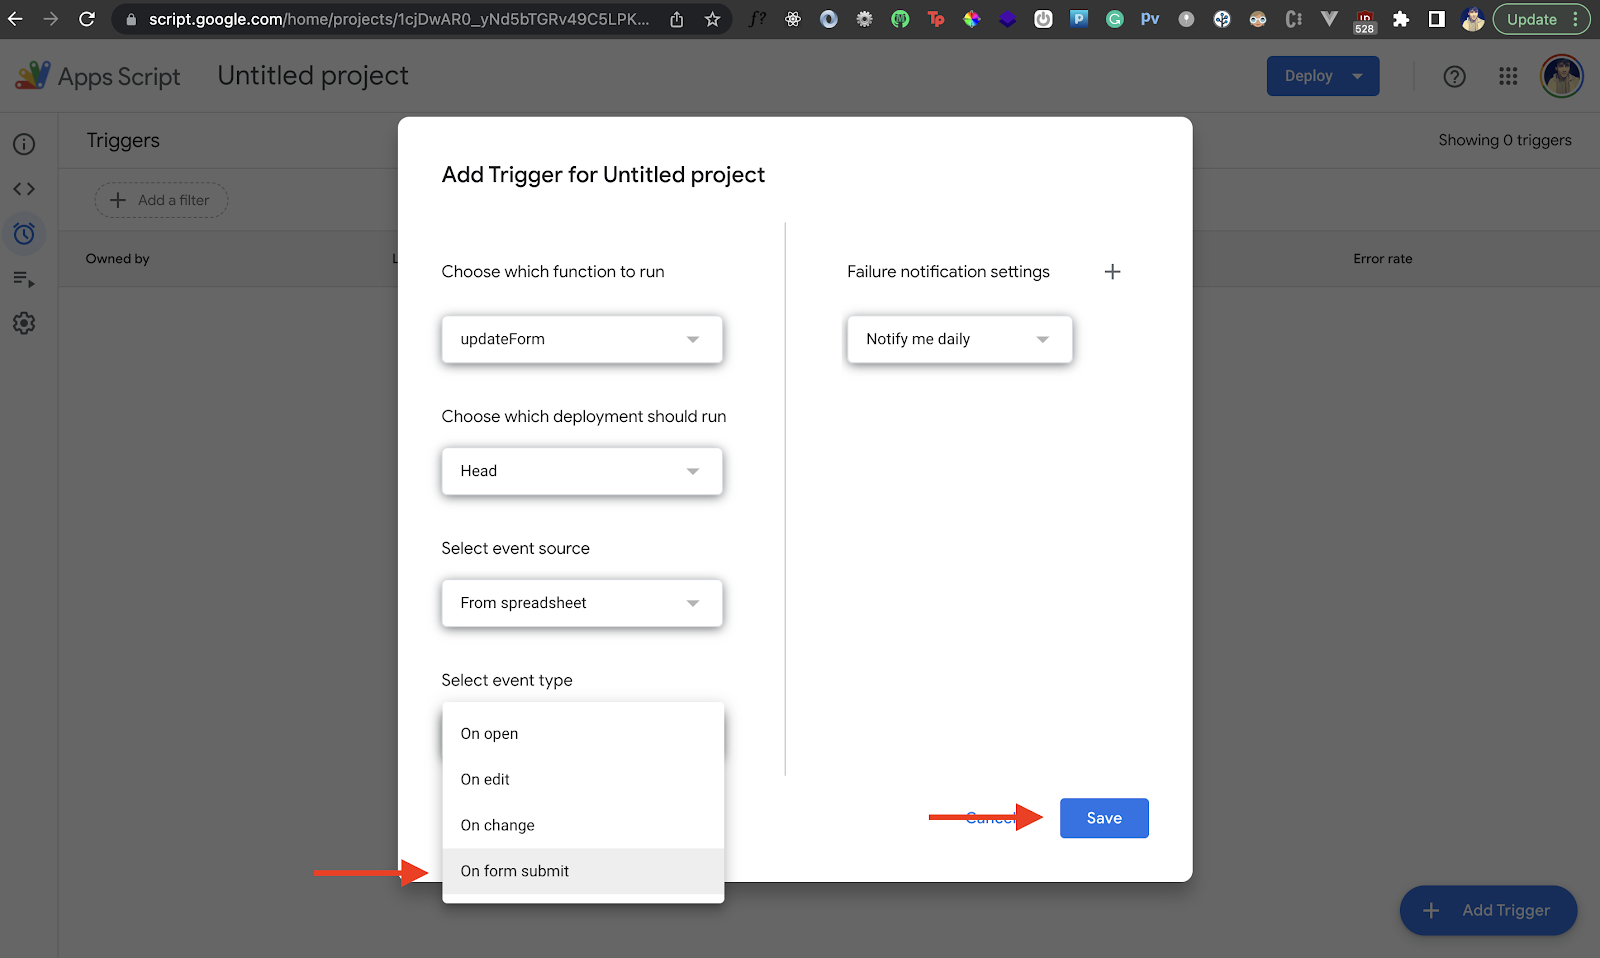
Choose the On form submit event type and hit Save:
Now your script should run every time anyone submits a ticket form.
Conclusion
You've learned how to create a minimal ticketing system using Google Forms and Google Sheets. However, there are far more effective ways to manage ticketing. Designing your own system requires time and effort. In addition, once designed, you and your team will not only be responsible for resolving tickets but managing the ticketing infrastructure you’ve created.
There are dozens of robust ticketing platforms in the market, and many of them offer freemium plans. For example, you could use a tool like Wrangle that automates ticketing and workflows in your Slack workspace.
Companies use Wrangle to automate IT ticketing, customer service requests, procurement approvals, expense reimbursement, access management, creative reviews, and so much more in their Slack workspace. If you have a business process in Slack, chances are Wrangle can make it more efficient.
Wrangle is the most powerful IT helpdesk for your Slack channels. Its powerful feature set enables you to:
- Turn any Slack message into a ticket
- Instantly allows users to see the status of a ticket
- Gather context with an intake form
- Automatically assigns tickets to the right agent
- Automate reminders to keep agents moving
- Provide powerful reporting to uncover bottlenecks
Wrangle’s tickets are also coupled with powerful workflows that allow agents to automate the mundane tasks that are often required when using ticketing platforms. You can also set custom workflows to tailor Wrangle for your use cases.
To get started, add Wrangle to your Slack workspace or schedule a demo with our team.
Ready to see Wrangle in action? Request a demo today. Better yet, add Wrangle directly to Slack and experience productivity gains shortly thereafter.
This post was written by Siddhant Varma. Siddhant is a full stack JavaScript developer with expertise in frontend engineering. He’s worked with scaling multiple startups in India and has experience building products in the Ed-Tech and healthcare industries. Siddhant has a passion for teaching and a knack for writing. He's also taught programming to many graduates, helping them become better future developers.
Wrangle learns from your tickets and knowledge base to handleup to 75% of Slack questions automatically.

4.7 Average rating


Turn Slack into a productivity powerhouse with Wrangle
Create a scalable helpdesk in Slack. Automatically turn messages into trackable tickets and provide faster, more transparent service to your colleagues and customers with Wrangle — Try it free!
Wrangle learns from your tickets and knowledge base to handleup to 75% of Slack questions automatically.
4.7 Average rating