.svg)

How to Create a Slack Group: A Painless Tutorial
This post assumes no prior knowledge and will cover the basics of how to create a slack group and group messaging.


Every day, millions of users across the globe spend, on average, nine hours per day logged into Slack. More than half of these users are in nontechnical roles. Although Slack is generally easy to use, it can be quite geeky. This article is for people who do not have a technical background and are new to Slack. It assumes no prior knowledge and will cover the basics of how to create a Slack group and group messaging. To start: What exactly are Slack groups? Let's dig in.
"A group in Slack is like a direct message between two people, except that it can include three or more people."
What Is a Slack Group?
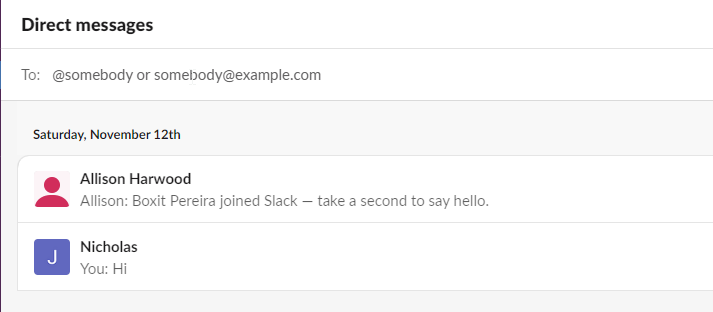
Most of the messaging on Slack takes place in either channels or direct messages. A group in Slack is like a direct message between two people, except that it can include three or more people. You create a group by adding one or more new members to an existing direct message or creating an entirely new group by selecting the people you want to message privately. Your Slack direct messaging groups will show up under the Direct messages tab on Slack, as seen below.

What is the Difference Between Channels and Groups in Slack?
One distinguishing difference is that channels have public visibility by default, whereas groups are only visible to the users involved in the conversation. However, although channels are public by default, they can be made private when they are created or at a later time.
Perhaps a better way to distinguish between channels and groups is to identify their purposes. Channels are generally used for conversations around a specific topic. For example, my company uses the convention of adding the prefix topic_ to the channels created for topic discussion. This way, any users looking for information on a subject can join the respective public channel.

On the other hand, groups are generally organized around the people in the conversation rather than the topic itself. The real-life parallel would be a water cooler conversation with a few colleagues. Your conversation is always private and visible only to users who are part of the conversation. You can add more users to the conversation, and Slack gives you the option to either make the previous messages visible or create an entirely new group from scratch.
Now that we know the difference between a channel and a group let's learn how to create a group.
How to Create a Group
Creating a group on Slack is very easy. Let's take it step by step.
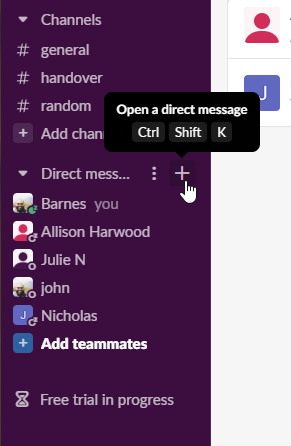
First, we must hover over the little + icon next to the Direct messages header. As seen in the image, you can also use the shortcut CTRL + SHIFT + K to trigger the same window—this is much faster than using the button.
Hover over the Direct messages header to see the buttons
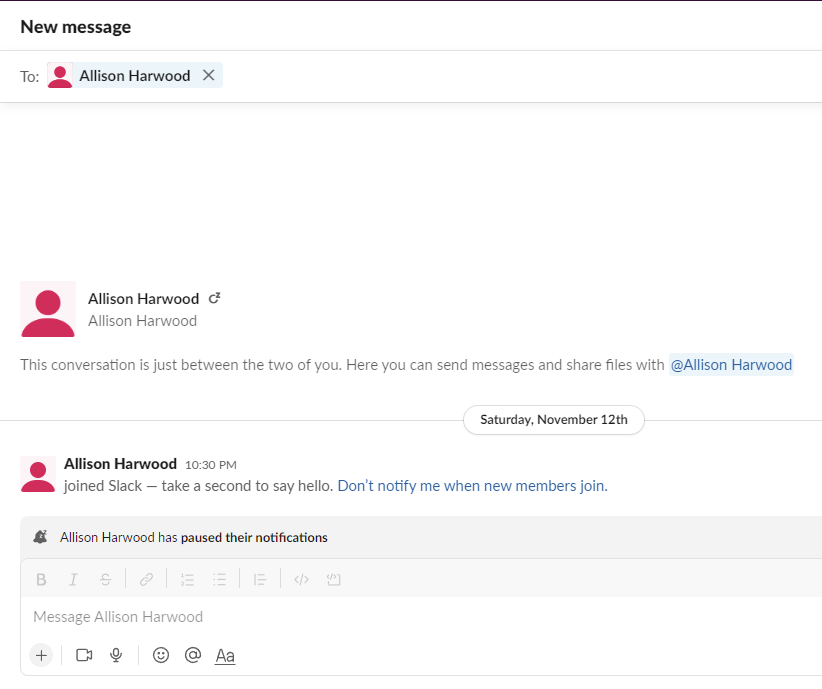
Either use the shortcut or click the button to trigger the Direct messages screen. Once you do, the following screen should show up. This screen allows you to define who you want to add to your private conversation. If you select one of the options shown underneath the search bar, you will be instantly taken to a direct message window with that person. If you want to select someone who's not shown in the initial list or if you want to add more than one person, you can simply start typing the name of the person you want to chat with.
Deciding on Participants
Let's say you want to start a new group conversation with Allison and Nicholas. You start by typing "Allison" into the To search input. Slack will attempt to auto-complete the name for you, and once it does, you can click the name to be taken into a direct chat with Allison.
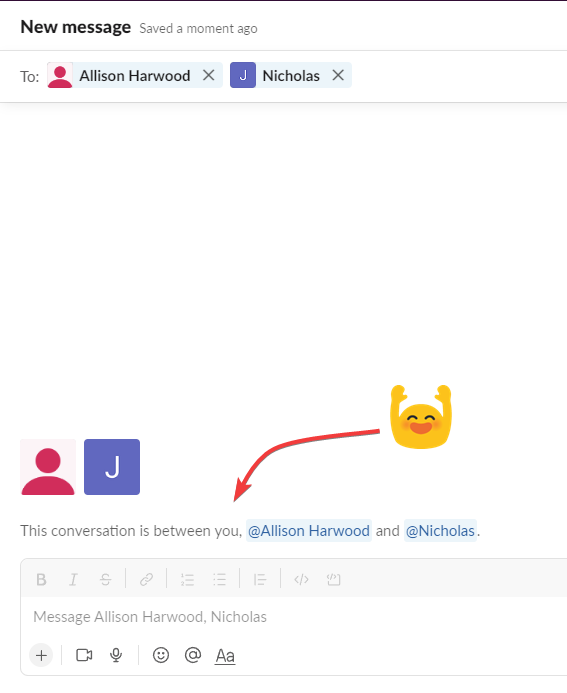
Because you wanted to chat with both Allison and Nicholas, you can continue the process of creating a group by typing Nicholas' name into the To field. Slack will automatically create a group chat with just Allison, Nicholas, and yourself. As you can see in the screenshot below, Slack will tell you who's currently in the conversation once you've created it.
Once you start messaging inside the group chat, Slack will add the group to the Direct messages section in the sidebar so you can go back to it anytime you want. Now you know how to create a new group! Next, you'll want to add people to the group.
How to Add Users to a Group?
Let's run a different scenario. You're having a good chat with Allison and Nicholas. Now you want to loop John into the conversation. You can do that in a couple of quick, easy steps. Follow along!
Start by opening the group chat and then clicking the title on the top. The title is the list of members in this chat. Once you do that, you'll see a screen that lets you add more people.
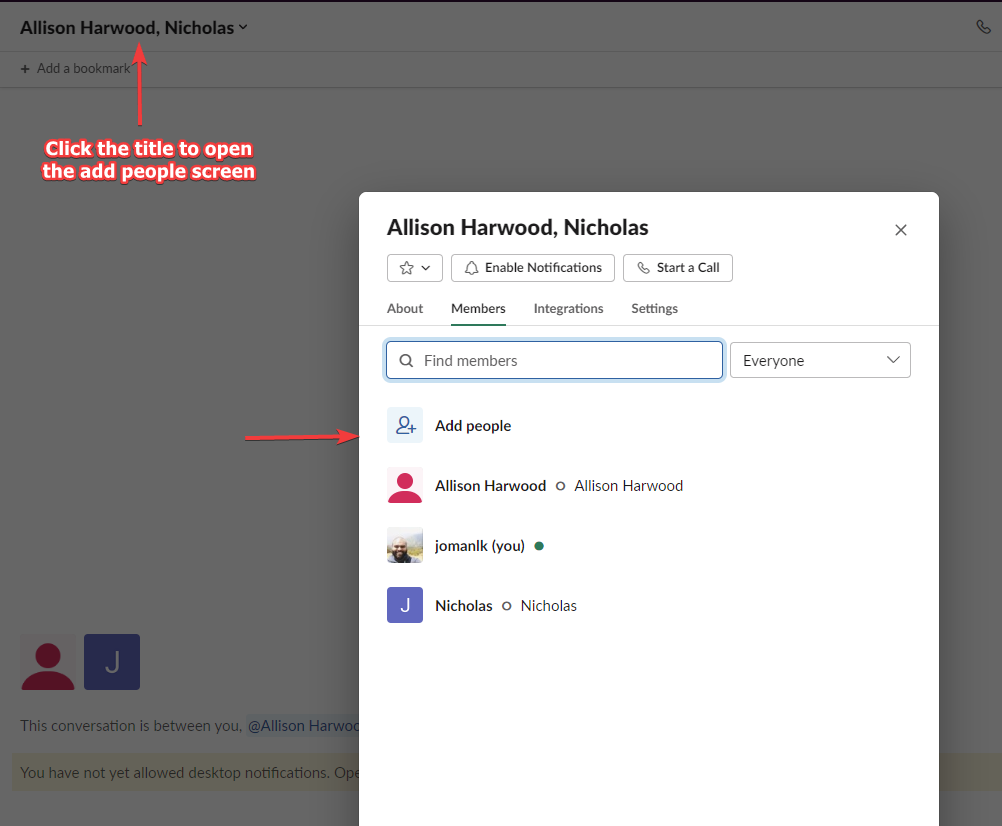
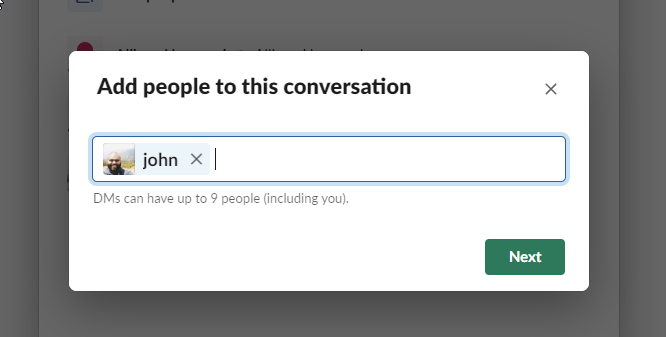
Next, click on the Add people button and start typing the name of the person you want to add to the chat. As seen in the image below, you can add up to nine people to your group. If you want to add more than that, creating a private channel will likely suit you better.
Once you've selected the members you want to add to the chat, you need to decide whether you want them to see the previous messages and files in the group. If you choose to include conversation history, the new member will get added to the group chat. If you choose to hide your chat history, the member will be added to a new group with no previous messages or files.
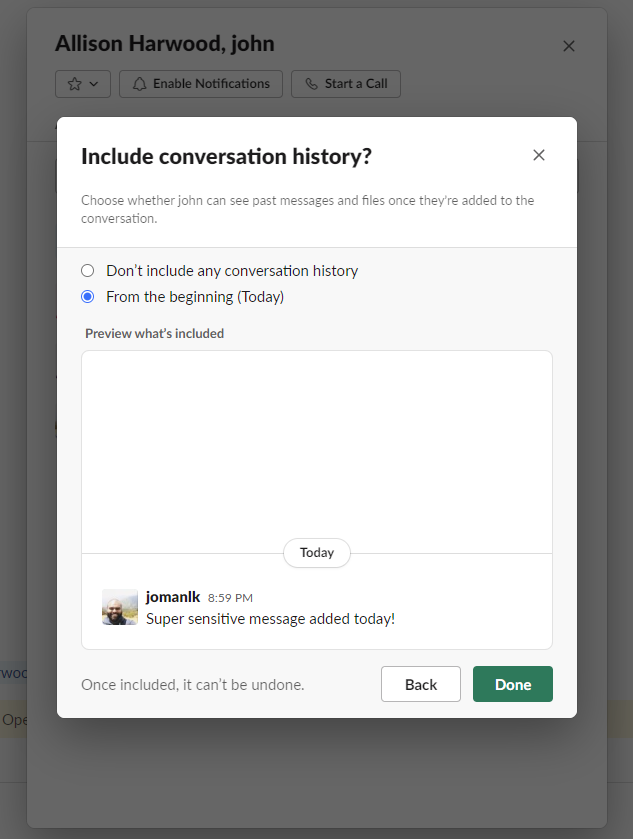
Now you know how to manage the permissions for new members that you add to your conversation. To avoid inadvertently leaking sensitive information to the wrong person without the correct permissions, consider the chat history and ensure you select the correct option from those shown in the conversation history screen.
Expanding to User Groups
Now that you know how to add people to group direct messages let's look at another way to group users. Here's the definition of a user group, according to Slack:
A user group is a group of members in a workspace who often need to be notified at once. You can mention a group's unique name — for example, @managers — the same way you @mention another member of your workspace.
Creating a user group is very simple, but keep in mind that only admins can create a user group.
To create a user group, click the menu item on the top left next to More or Browse Slack and select People & user groups. Here, you will see the members in your workspace and user groups.
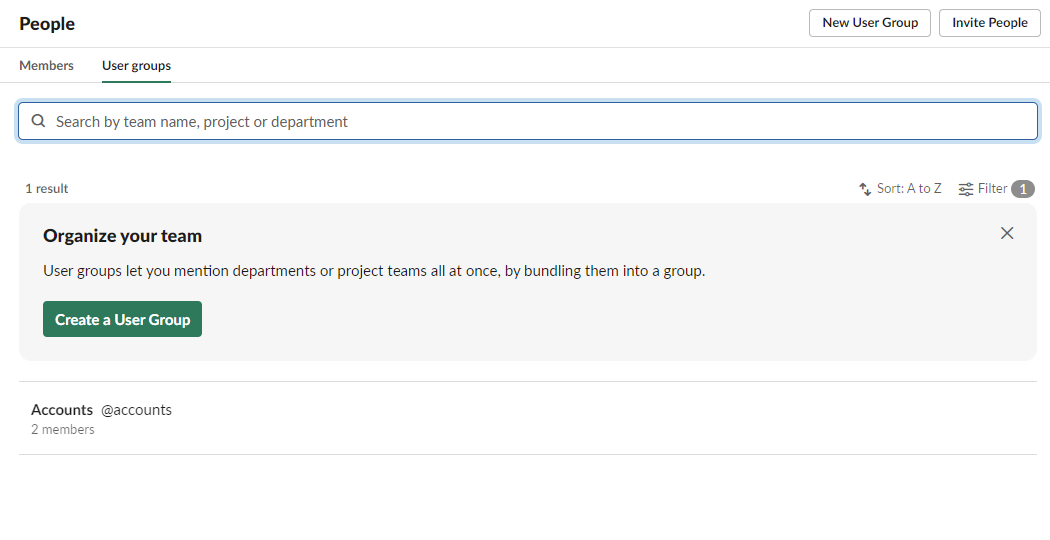
Next, click the Create a User Group button to open the Create User Group screen. Here, you can supply a name, handle, and purpose for your group. You can also define the channels to which the group members should be automatically added.
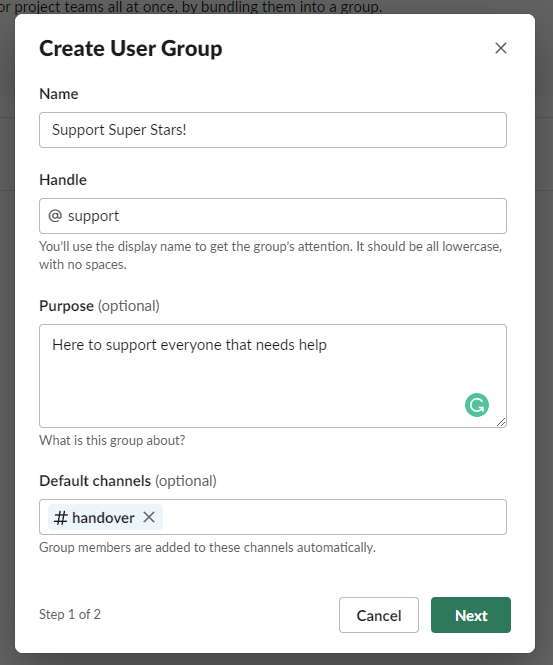
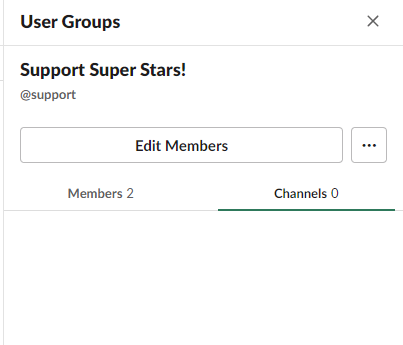
Once you've filled in this information, the next step is to add the members—just like we did earlier when we created the direct messaging groups. Now anyone in your workgroup in Slack can tag @support and tag the user group into the conversation.

Now that's handy!
If you want to edit or delete your user group, you can do it from the People & user groups screen. All you need to do is click the user group and use the screen on the right side.
What's Next?
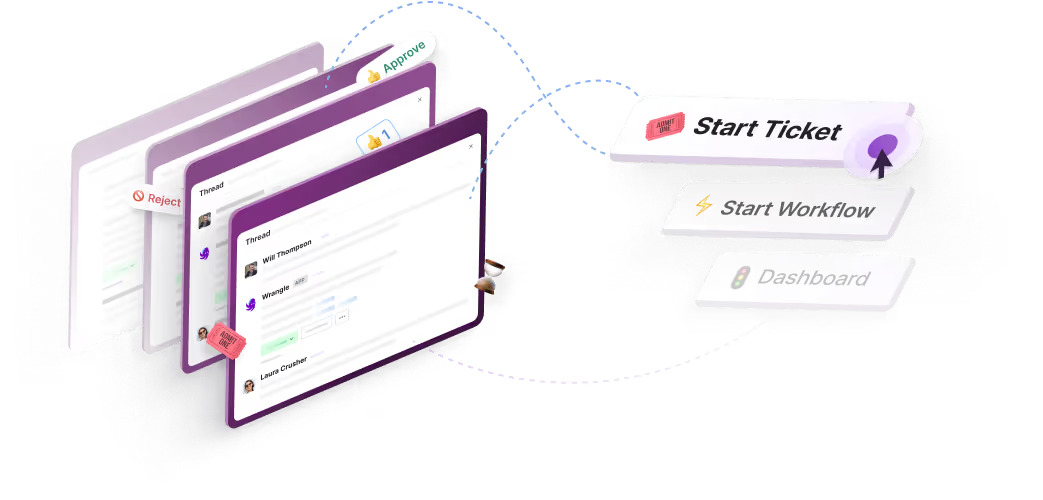
In this post, we learned about group direct messages and user groups. We covered the basics of creating them and how to manage them within Slack as a Slack admin or owner. But you can do way more with Slack than just the basics. In fact, with the right tools, Slack can be a productivity engine. That’s where Wrangle enters the equation.
Wrangle is a workflow and ticketing application built for Slack. Instead of managing requests and approvals manually, Wrangle automates the process with workflows and tickets. Wondering what that looks like in action? Companies around the globe add Wrangle to Slack for a variety of purposes including:
- Manage your IT help desk in Slack
- Document approvals
- Creative reviews
- Employee Onboarding
- Customer service tickets
- Expense management
- Procurement approvals
If you have a business process that’s in Slack, chances are Wrangle can help you automate with workflows and ticketing.
Try Wrangle for Free:
To get started, add Wrangle to your Slack workspace for free or schedule a demo with our team.
This post was written by John Pereira. John is a technology enthusiast who's passionate about his work and all forms of technology. With over 15 years in the technology space, his area of expertise lies in API and large-scale web application development, and its related constellation of technologies and processes.
Wrangle learns from your tickets and knowledge base to handleup to 75% of Slack questions automatically.

4.7 Average rating


Turn Slack into a productivity powerhouse with Wrangle
Create a scalable helpdesk in Slack. Automatically turn messages into trackable tickets and provide faster, more transparent service to your colleagues and customers with Wrangle — Try it free!
Wrangle learns from your tickets and knowledge base to handleup to 75% of Slack questions automatically.
4.7 Average rating