.svg)

How to Create Checklists in Slack, Assign Due Dates, and More
A Slack checklist is an efficient way to create to-do items and strike them off in collaboration with your teammates.


Slack is a powerful tool used by teams today for communication and managing work remotely. However, Slack also has some lesser-known capabilities that can actually be helpful in project-management-related tasks. One of them is the ability to create checklists. A checklist in Slack is an efficient way to create to-do items and strike them off in collaboration with your teammates. Creating to-do lists in Slack can help you supercharge your productivity as a team and work together more efficiently.
So in this post, we'll walk through how to create checklists in Slack, assign due dates, and enable collaboration on them using Slack posts.
"In its most basic form, a checklist should allow you to add to-do items that you can later mark as done by checking off a box."
Create a Basic Checklist in Slack
Let's first learn how we can create a very simple and minimal checklist in Slack. In its most basic form, a checklist should allow you to add to-do items that you can later mark as done by checking off a box. We can do this by creating a Slack post.
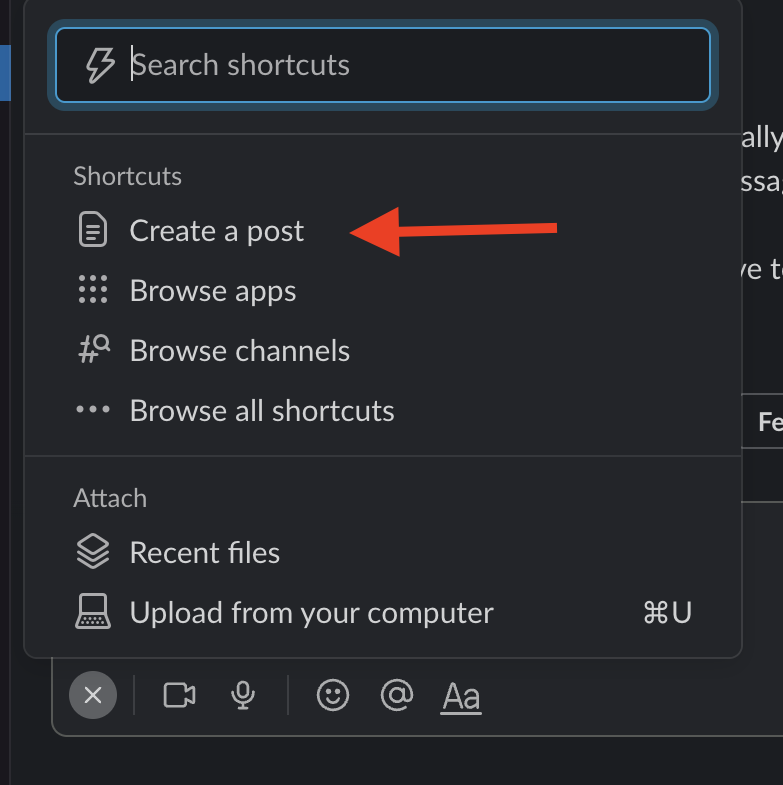
In the message box, click on the plus (+) icon located in the bottom-left corner:

That should open a popup menu with a number of options. Choose Create a post:
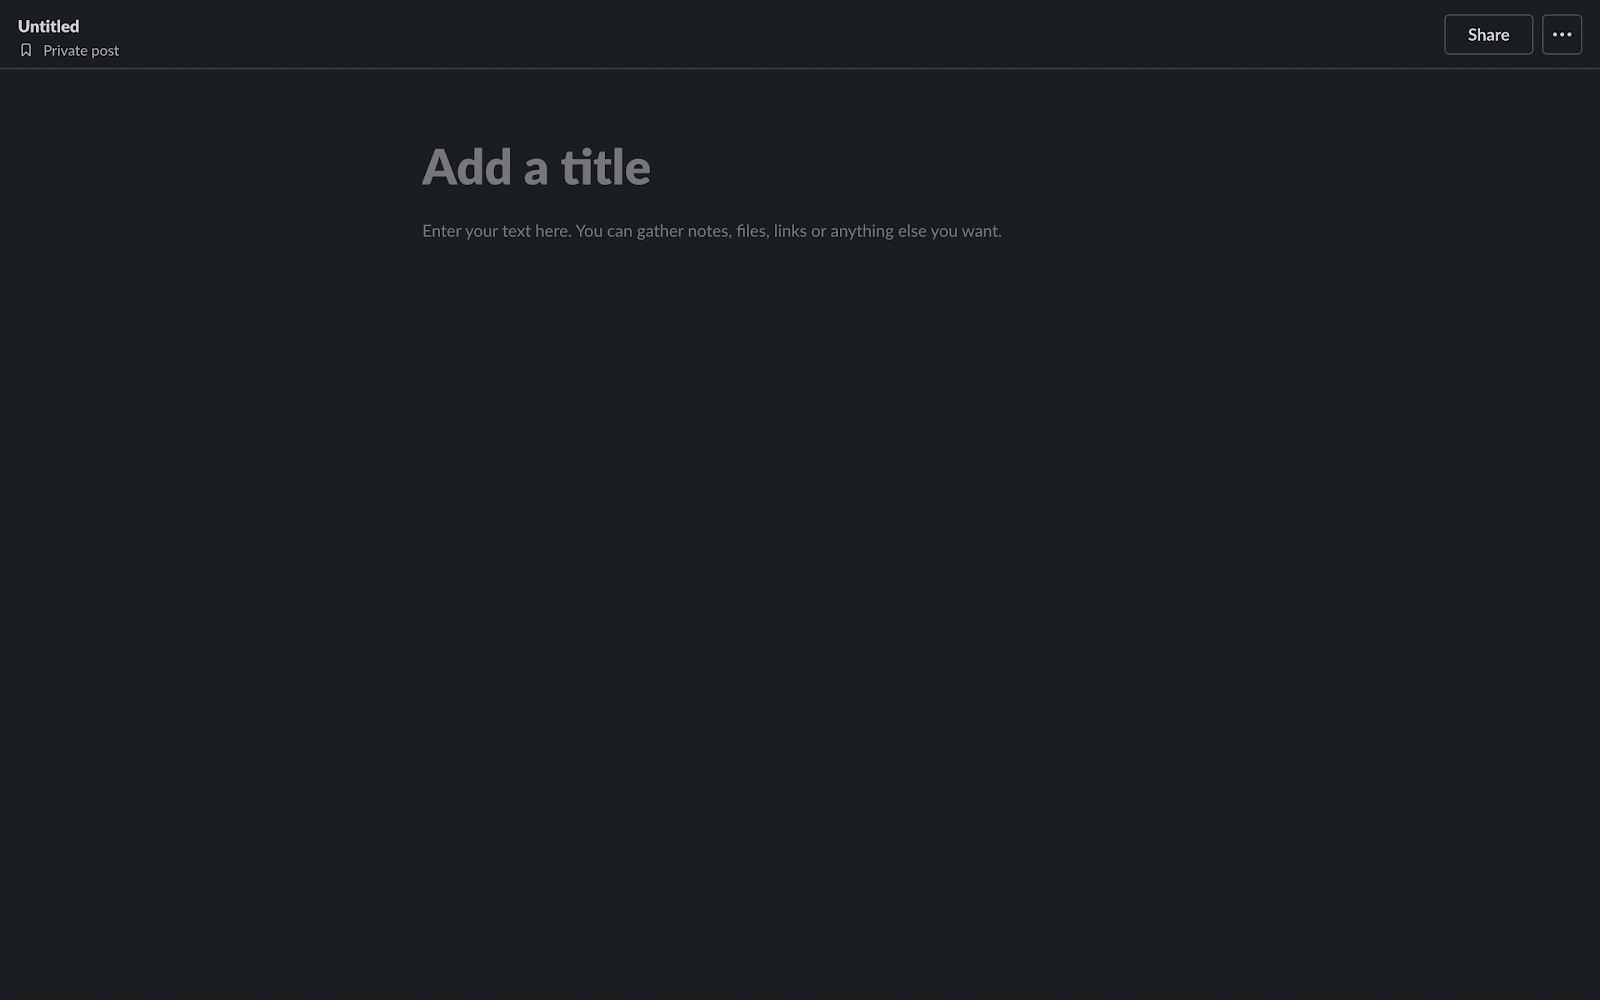
Once you do that, Slack should open an empty post template for you that looks like this:
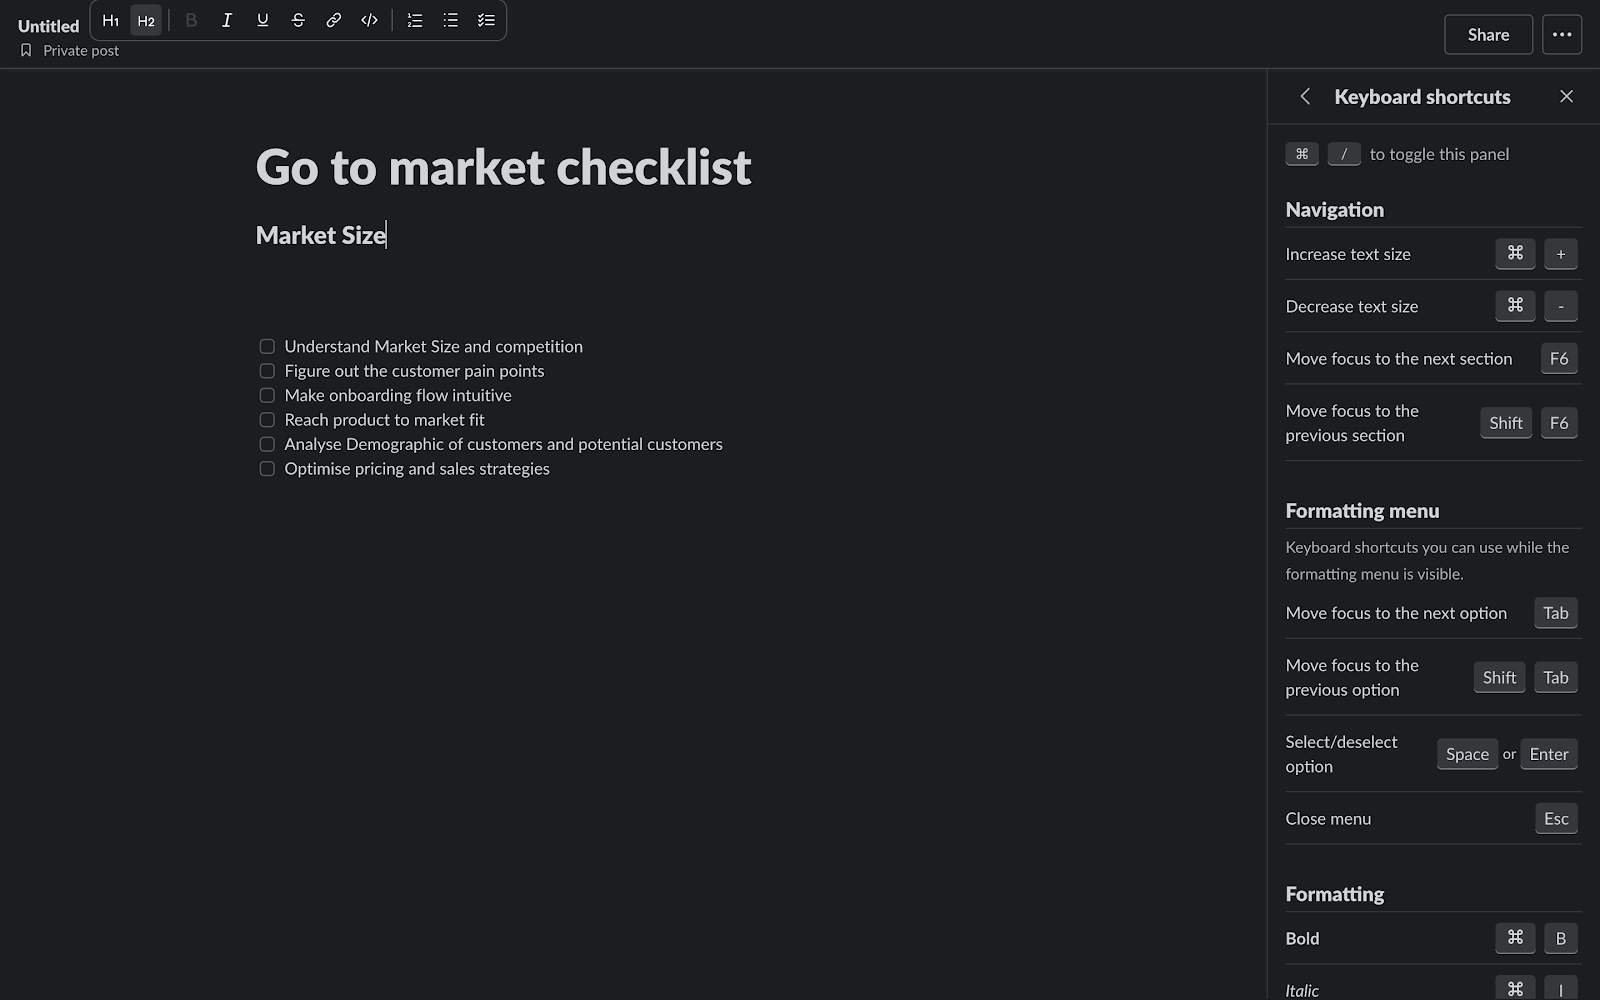
Give your checklist a title. In this example, we'll create a checklist for our go-to-market strategy for our startup. Sound exciting? Let's also add some checklists or to-do items.
To do that, type in two square brackets next to each, like [ and ] without any space between ([]). Then hit the space bar and voilà! That should automatically turn into a checkbox. If you now type in something, you've essentially created a checklist item. And if you press Enter, Slack will automatically add another checklist item by default on the next line.
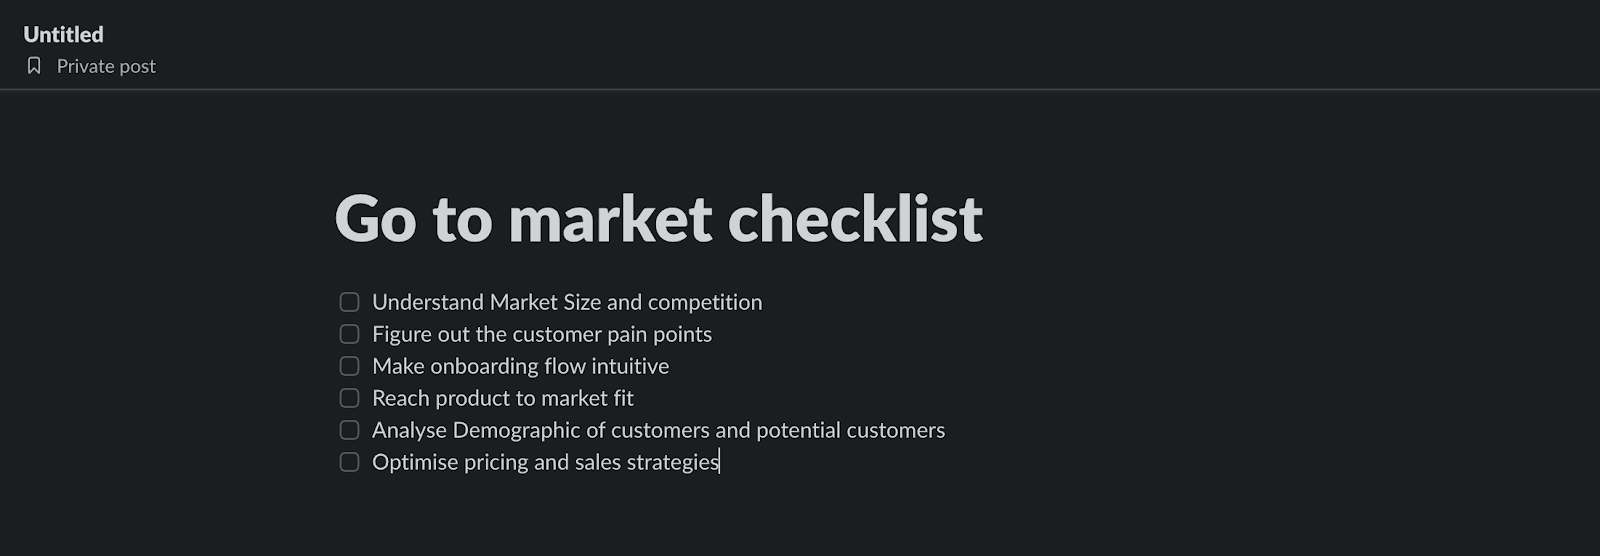
Look at that! You've created a basic checklist already. Awesome! Let's learn how we can format it better with Markdown now.
Formatting Checklist With Markdown
Slack posts, by default, run on Markdown. Markdown is a syntax that lets you format text the way you want. You can use that syntax to create checklists, as we've already seen above, using the brackets syntax. You can also use it to bold text, add a strikethrough decoration to it, format code font, add bullet points, and much more! It's like a mini rich text editor to give more life to your Slack post. In fact, formatting messages and posts are Slack's recommended way of composing messages to convey information in a more visually effective manner.
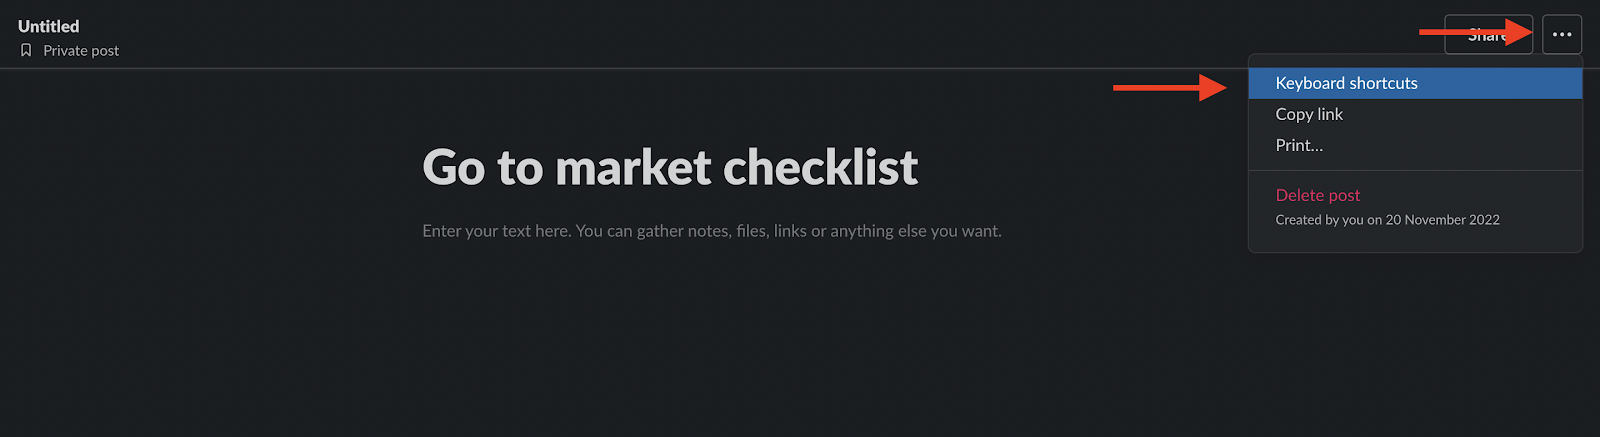
In our Slack post, let's click the three dots in the top-right corner. Once you do that, you should see a small popup menu with an option labeled Keyboard shortcuts. Click on that:
That should open a panel to the right of the post showing you all the keyboard shortcuts available. Scroll down to the Formatting section, and this is where you can look at all the syntax you need to format your checklist using Markdown.

Now let's format and rewrite our checklist. If you notice, we created a title with a heading size. Although Slack automatically enabled large title formatting for the title of the post, you can add a single hash (#) and press Space to add another large title. Since we already have it, let's try adding a small title. This time, we'll add two hashes without any space (##) and hit the space bar. That should enable small title formatting:
Let's do the same so we can actually break down our checklist into sections based on the checklist points we've made already:
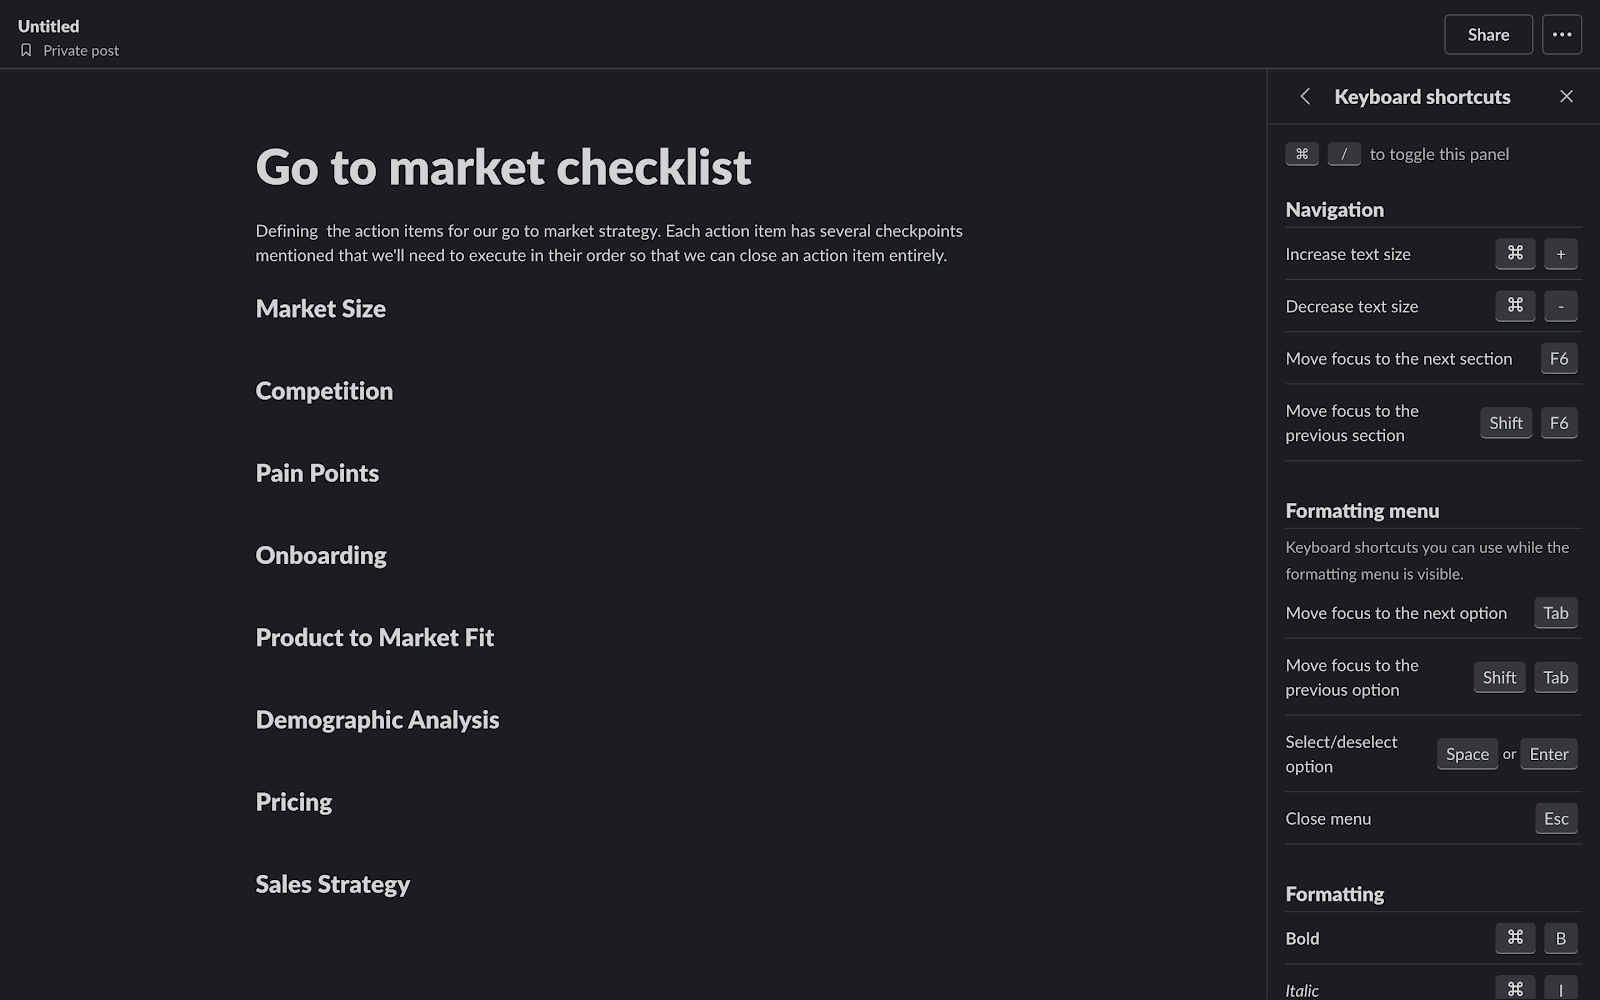
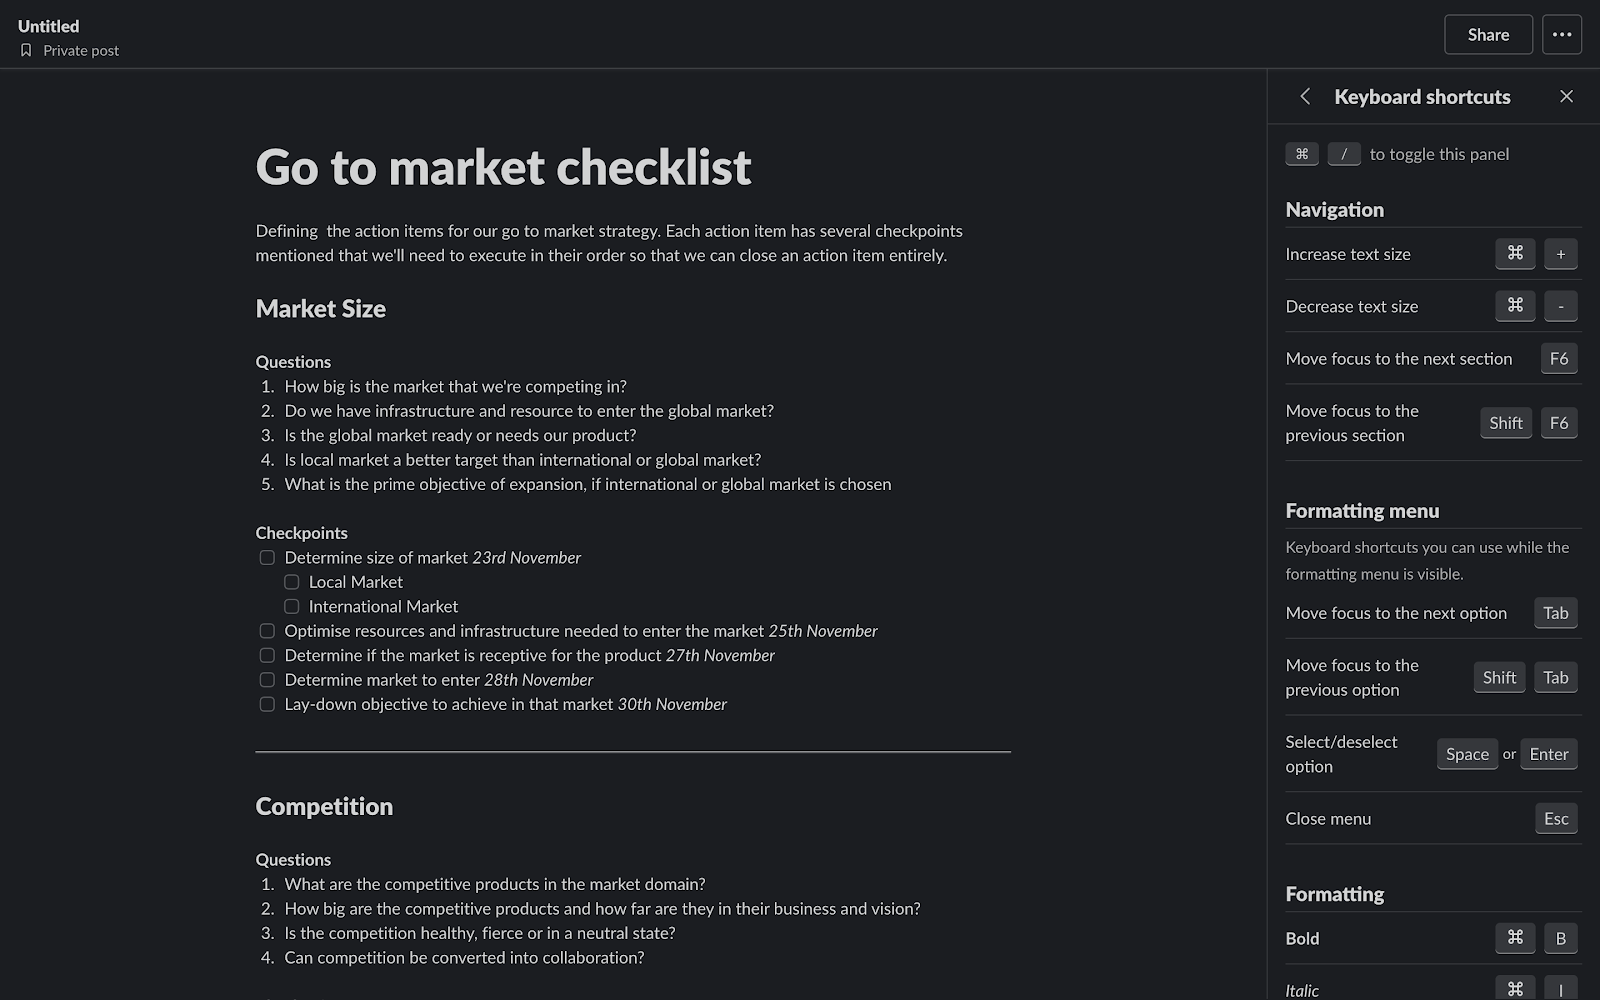
This looks much better! Let's go back and add each checklist item inside an action item. But before that, let's make this checklist a little more verbose. nside the "Market Size" section, we'll list the questions we need answered. Now, we'll write down "Questions," but we'll bold it using the Command-B (Ctrl+B on PC) keyboard shortcut so it stands out like a subtitle. Then, we'll add the questions in a numbered list. To make a numbered list, simply put down the number 1 followed by a period, and then hit Space to automatically convert it to a numbered list.
Then we can write the checklist items themselves. Here's how we can format the "Market Size" section:

Notice that I've created subtasks under the "Determine size of market" item. You can add those simply by using a tab or spaces. Further, I've also added a divider after the "Market Size" section. This makes our checklist more effective in conveying the information clearly to everyone.
Advanced Checklist Functions
We've learned how to create a neat-looking and properly formatted checklist. Great! But let's move on to some advanced functions.
Assign Due Dates
No checklist is complete without a deadline. To make sure the checklist is executed more efficiently, we can simply add a due date next to each action item. Let's say we wish to wrap up the "Market Size" action item this month. We can add due dates next to each parent checkpoint and format them in italics so that the due date stands out:
Collaboration
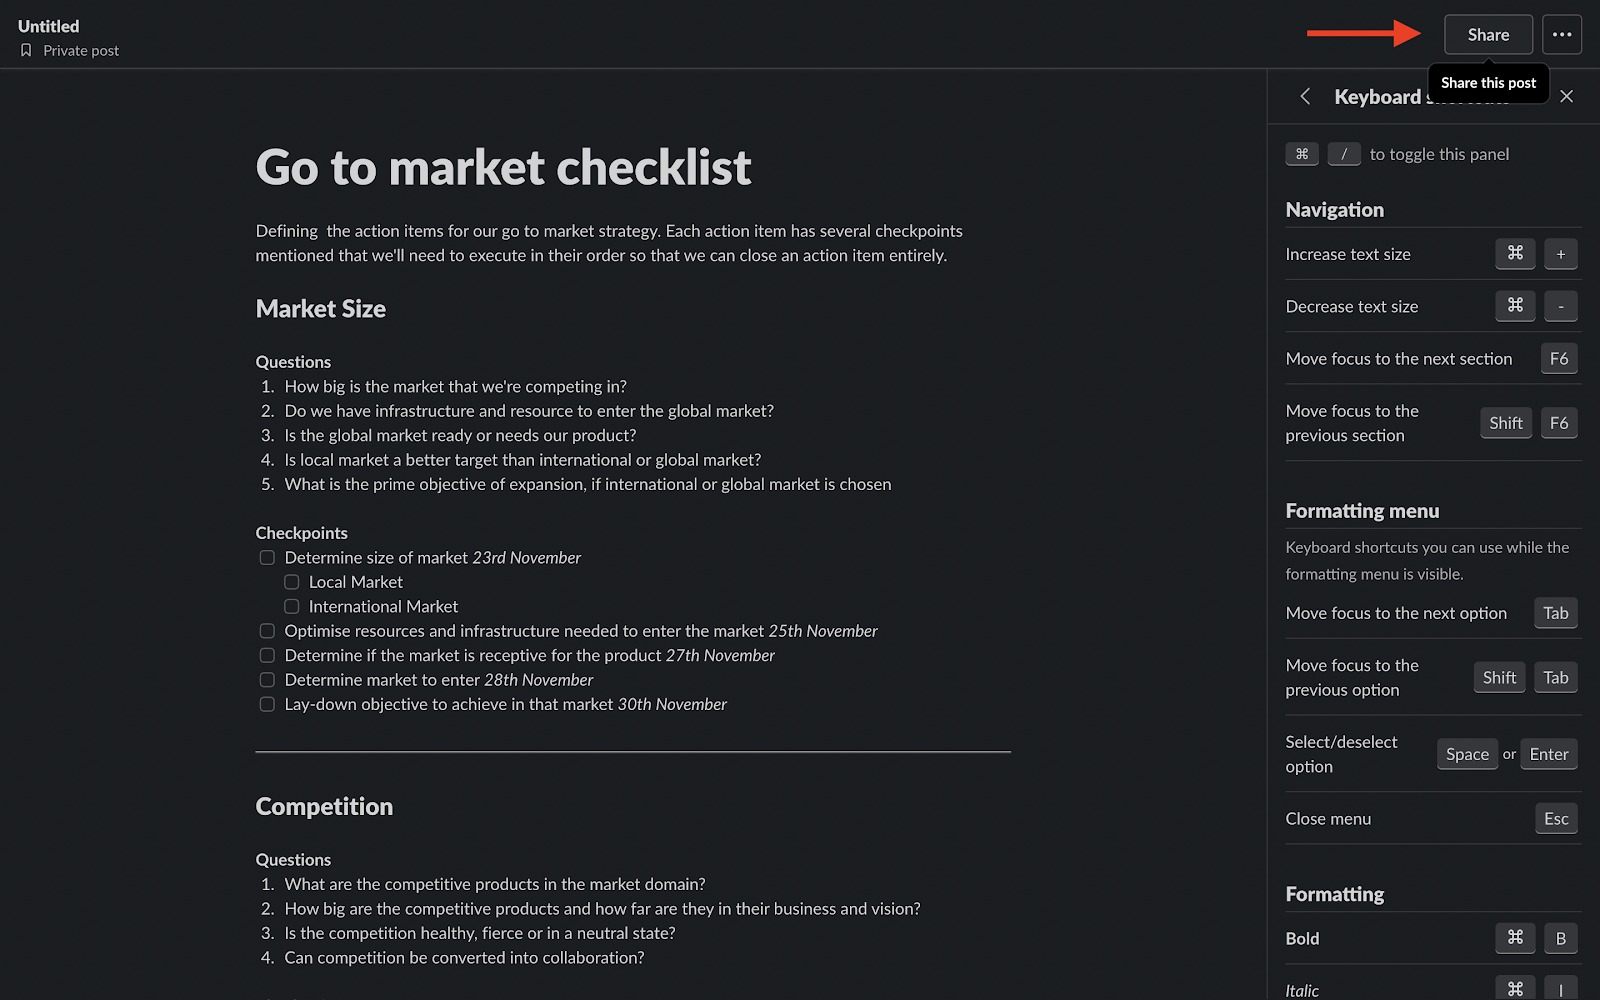
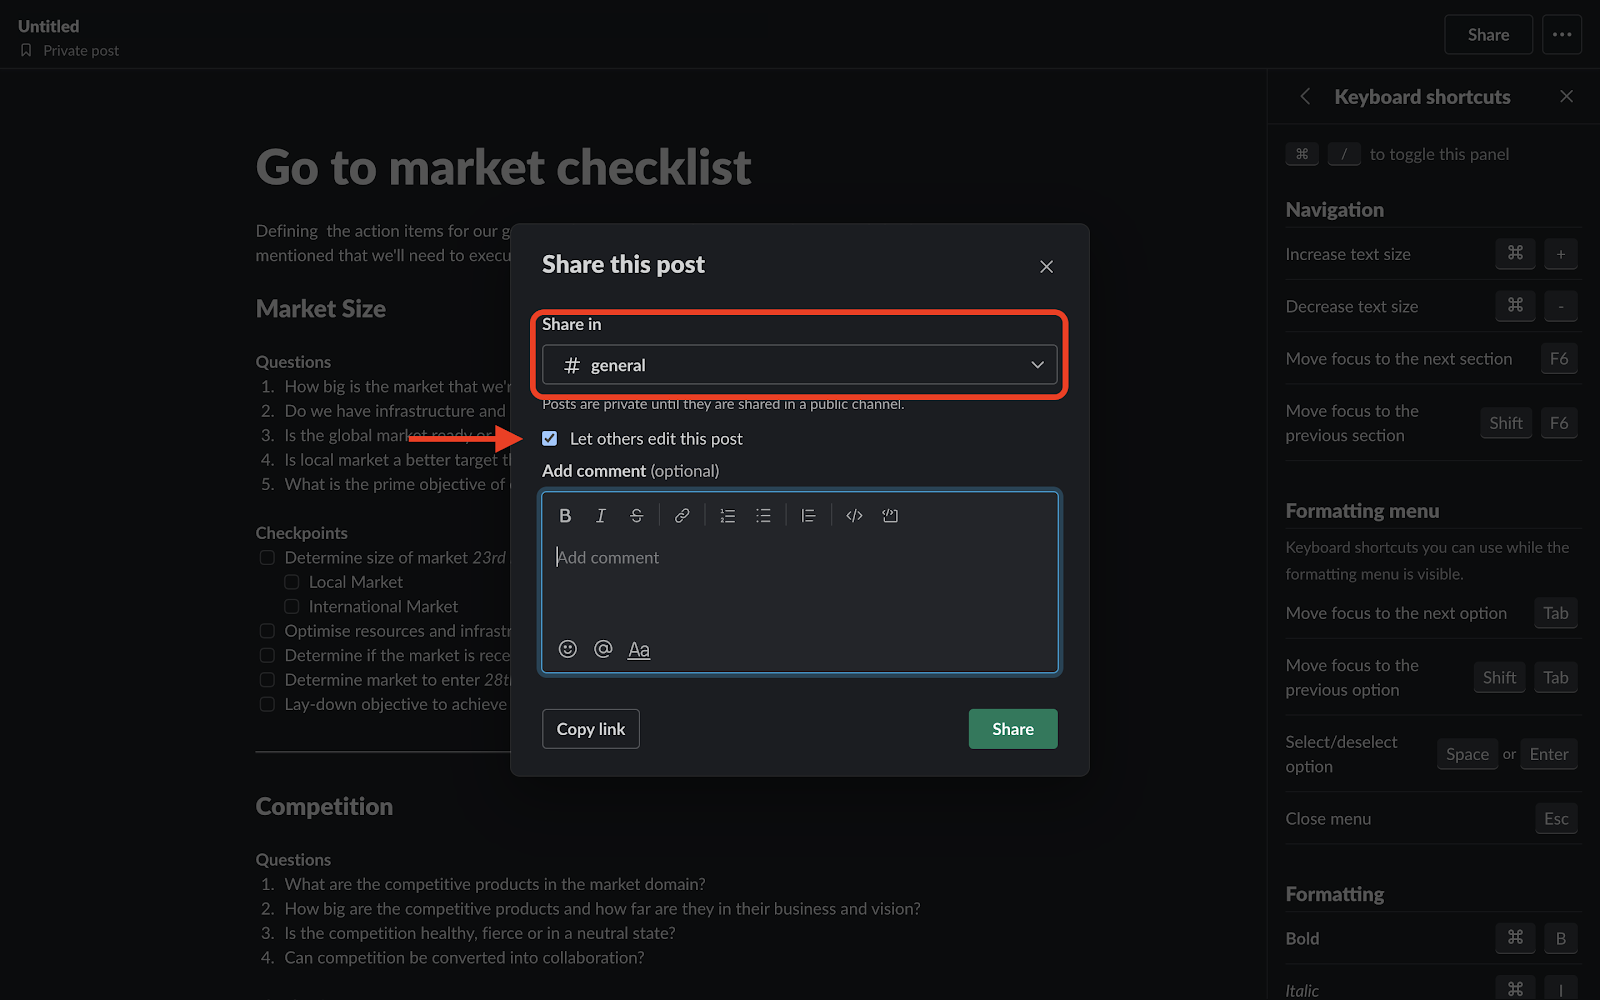
Another important function is collaboration! What good is a checklist that can't be edited or updated, or where the items can't be checked off? First, we need to enable editing and share our checklist posts on a public channel. This will enable editing for the Slack post. Click on the Share button in the top-right corner of the post:
That should open the share settings popup for you. Choose a public channel in the channel dropdown and make sure you check the Let others edit this post option. Then click on the Share button:
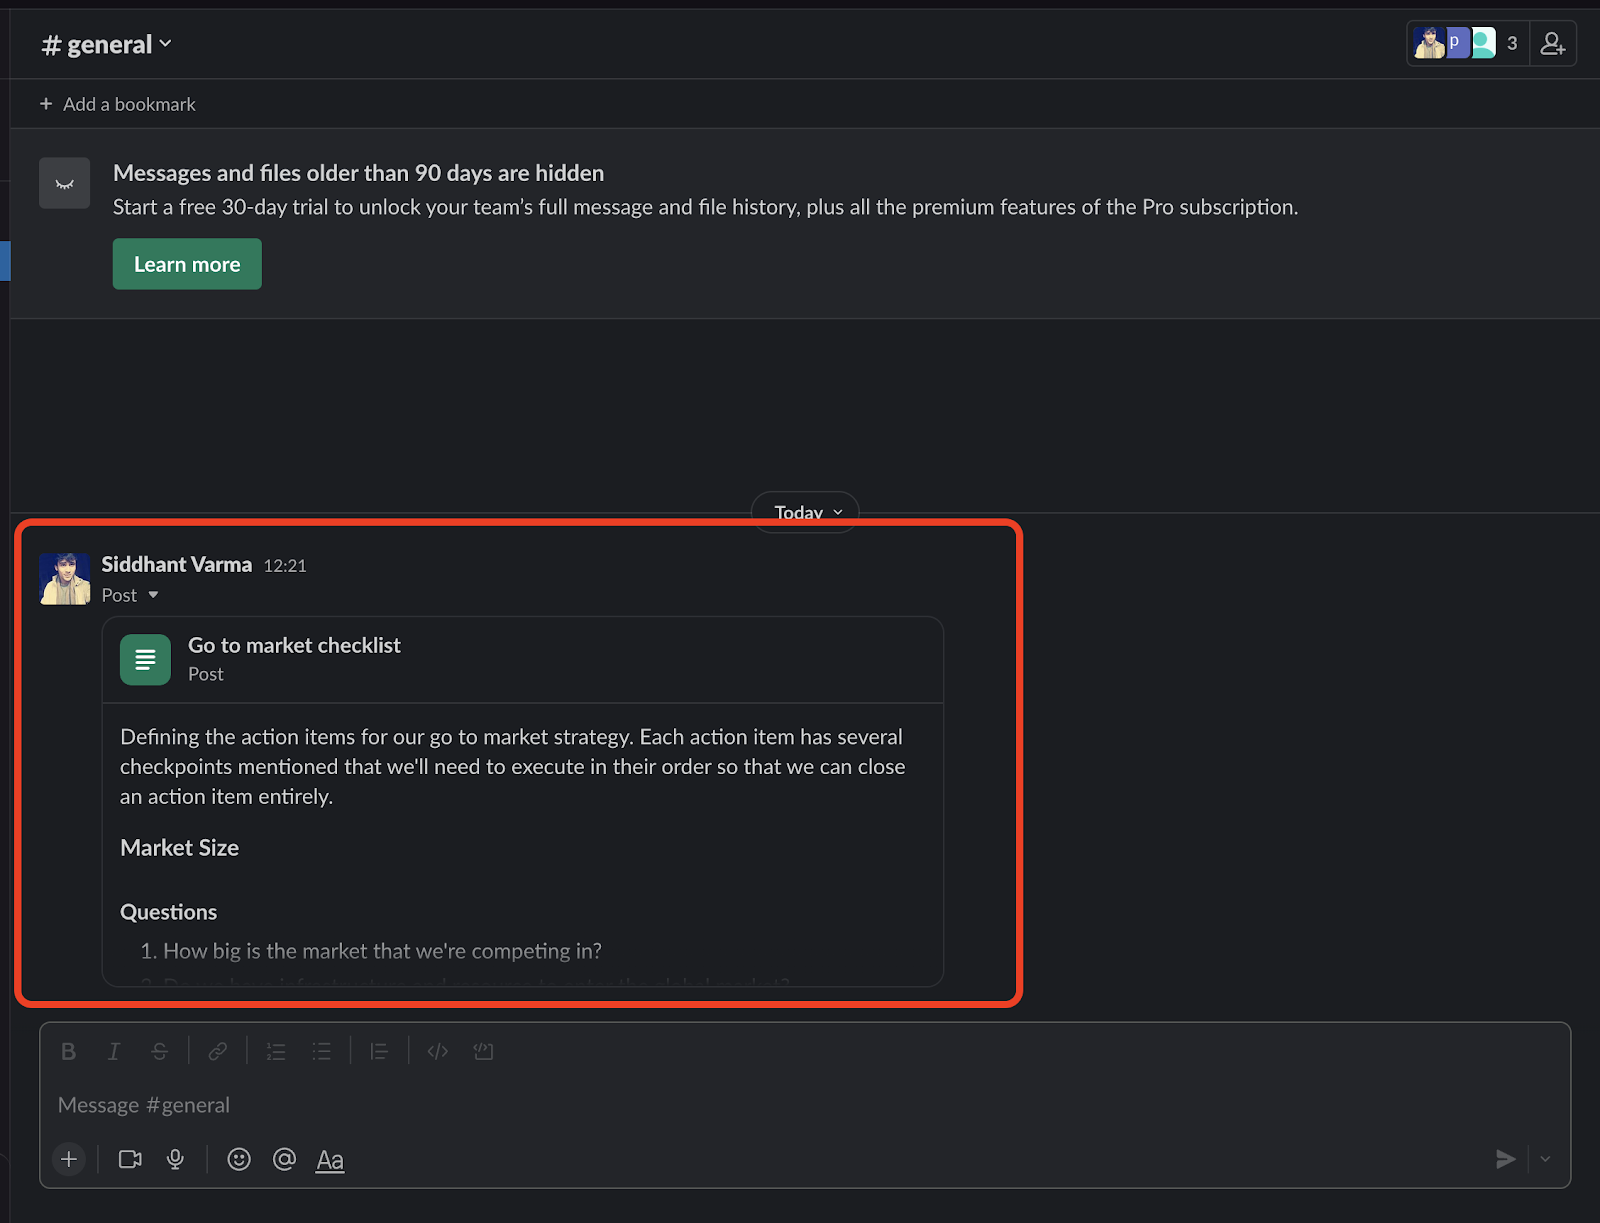
Once you do that, you should see the post shared in the channel, as shown below:
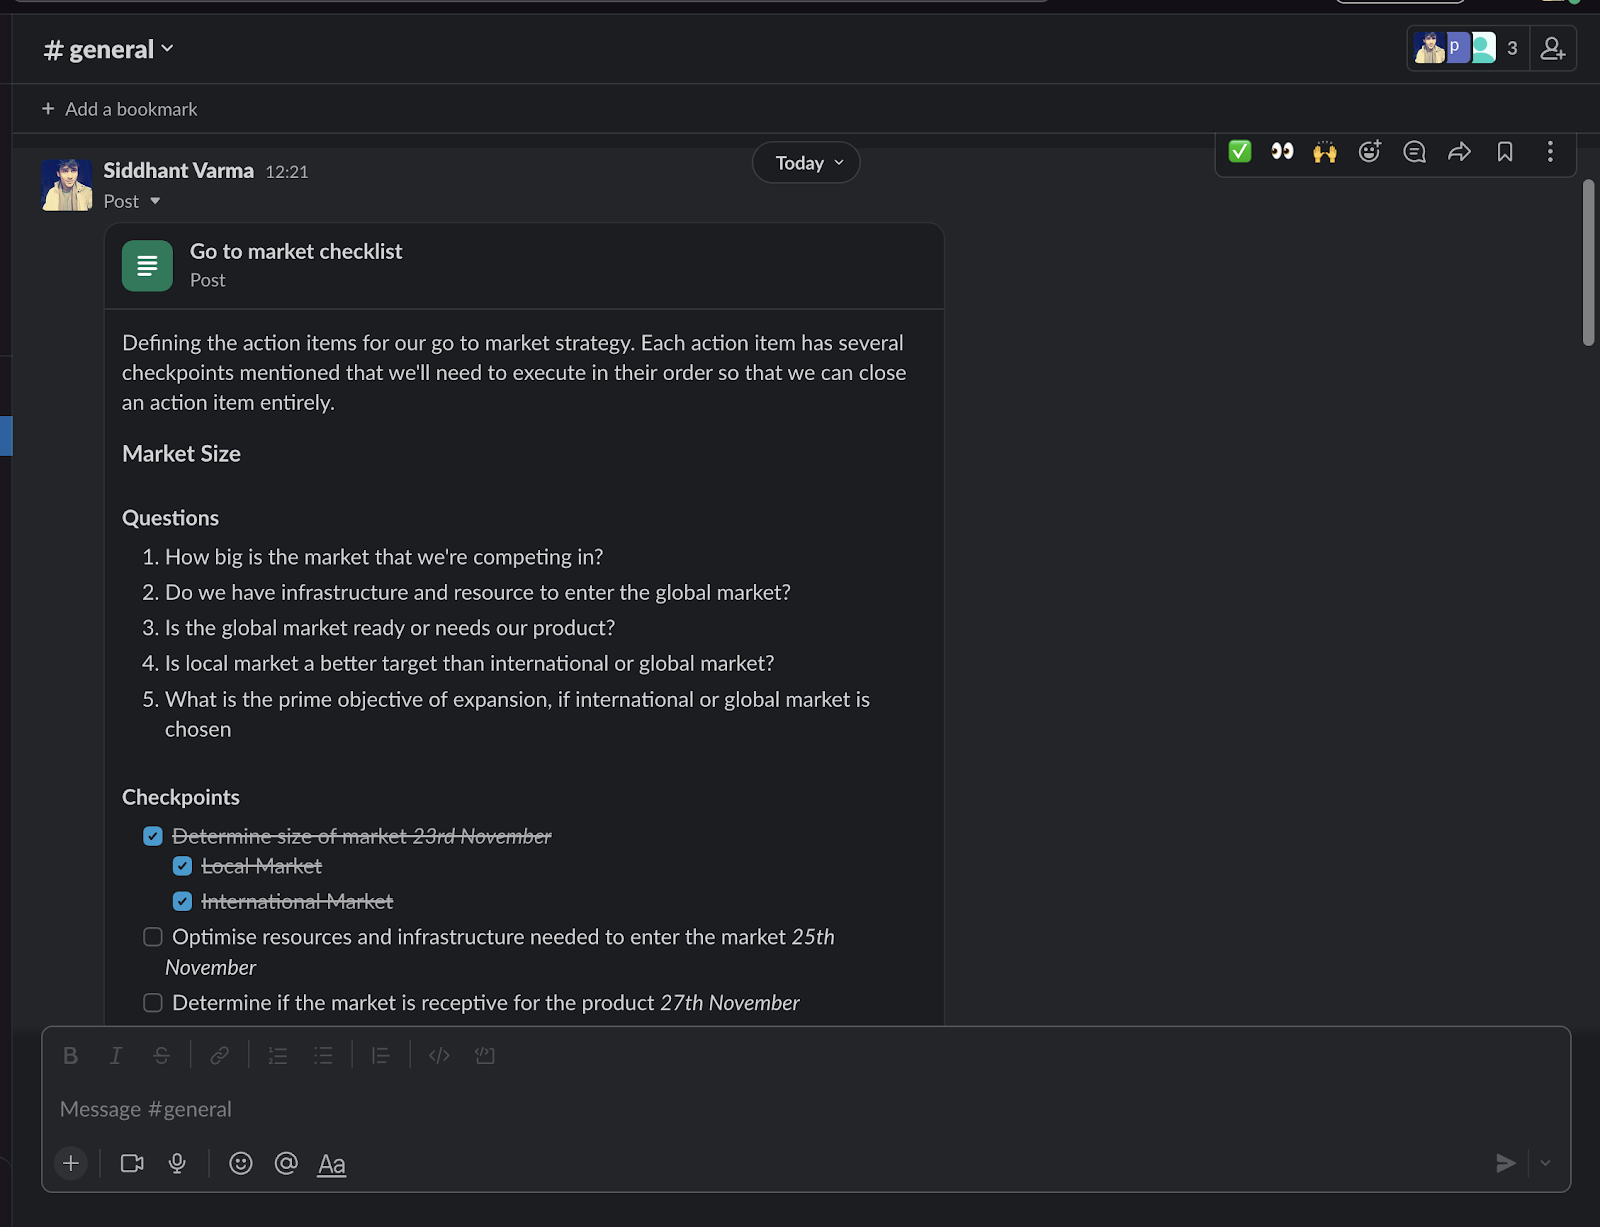
Now any member in this channel can actually edit the checklist and check off the items in the list. For instance, someone can check off the first item, and the checklist would automatically update:
Also, on the post itself, you should be able to see an Edit button that will let you edit the post entirely:

How Checklist in Slack Can Improve Project Management
Slack checklists can help you quickly take information from your Slack workspace and translate it into to-do or actionable items. The biggest benefit of using Slack checklists is that you can embed Slack messages or even external URLs into them to give more context to a specific task. If you need to manage certain actionable items among your team quickly, you can create a post and add a checklist that your team members can collaborate on as well. This can help you manage your projects faster without leaving your favorite work tool at all.
Also, the editing feature allows anyone else from your team to pitch in at any point. This is great because it divides responsibility and ownership among your team members.
In addition, you don't need to create a dedicated Slack post for a checklist every time. You can also quickly create a checklist under any thread or message directly. Plus, you can save certain messages and use your saved messages section as a personal checklist.
Limitations of Checklist in Slack
While Slack checklists are definitely useful and quick to navigate, they do have some limitations. As you've seen, we've assigned due dates, but there are no scheduling options or reminders associated with them. Also, you don't have the option to assign checklist items as tasks to other team members in a Slack post. For instance, in a regular checklist that you create using Slack messages, you can tag a team member to assign them to a checklist item. However, the same can't be done for a checklist created using a Slack post. It would be nice to set due dates for items and then send reminders for updates on the checklist.
Moreover, you can't automate or attach any external metadata with your checklist in a Slack post. For instance, you might want to schedule various checklists similar to the way you can schedule a Slack message or a meeting.
For a more flexible workflow, you may want to use a separate to-do list or task management plugin like Wrangle instead. Wrangle is a purpose-built Slack application for approval and ticketing workflow automation, used by finance, sales, IT, marketing, HR, and others to automate ticketing, onboarding, customer refunds, and so much more. Wrangle automatically assigns tasks and approvals for team members to follow up and take action so they can go about their business and respond when necessary. If you have a business process, a Wrangle workflow can automate that process in Slack.
If you’re using Slack, you may want to consider adding a product like Wrangle to the mix to streamline workflows. Ready to see Wrangle in action? Request a demo today. Better yet, add Wrangle directly to Slack and experience productivity gains shortly thereafter.
This post was written by Siddhant Varma. Siddhant is a full stack JavaScript developer with expertise in frontend engineering. He’s worked with scaling multiple startups in India and has experience building products in the Ed-Tech and healthcare industries. Siddhant has a passion for teaching and a knack for writing. He's also taught programming to many graduates, helping them become better future developers.
Wrangle learns from your tickets and knowledge base to handleup to 75% of Slack questions automatically.

4.7 Average rating


Turn Slack into a productivity powerhouse with Wrangle
Create a scalable helpdesk in Slack. Automatically turn messages into trackable tickets and provide faster, more transparent service to your colleagues and customers with Wrangle — Try it free!
Wrangle learns from your tickets and knowledge base to handleup to 75% of Slack questions automatically.
4.7 Average rating